
From setup to sharing
Use Contractor Edition to keep customer details, projects, site visits, field media, and report sharing together. This guide walks through the complete Site Visit workflow. Punch Walks are also available from the Job Workspace.
- Customer
- Job / Project
- Site Visit
- Media & notes
- Share or PDF
Before you begin
Sign in to FieldNovi, confirm the selected workspace, and have your customer name, project details, and field media ready. Follow the full guide or jump to the step you need.
- Customer
- The company, client, owner, or account you are documenting work for.
- Job / Project
- The specific work under that customer, with a project name and optional internal job number.
- Site Visit
- A dated record of field activity, notes, photos, videos, 360° media, and report details.
- Project Contact
- A reusable recipient associated with a project for future Site Visits and Punch Walks.
- Share Link
- Read-only report access with an expiration and options for image visibility and PDF downloads.
STEP 1 OF 12
Open Contractor Edition
From the main FieldNovi navigation, select Workspace → Contractor Edition. The Customer Directory is the starting point for your contractor records, jobs, Site Visits, and Punch Walks.
Select New Customer to create the company or account that will own the project.
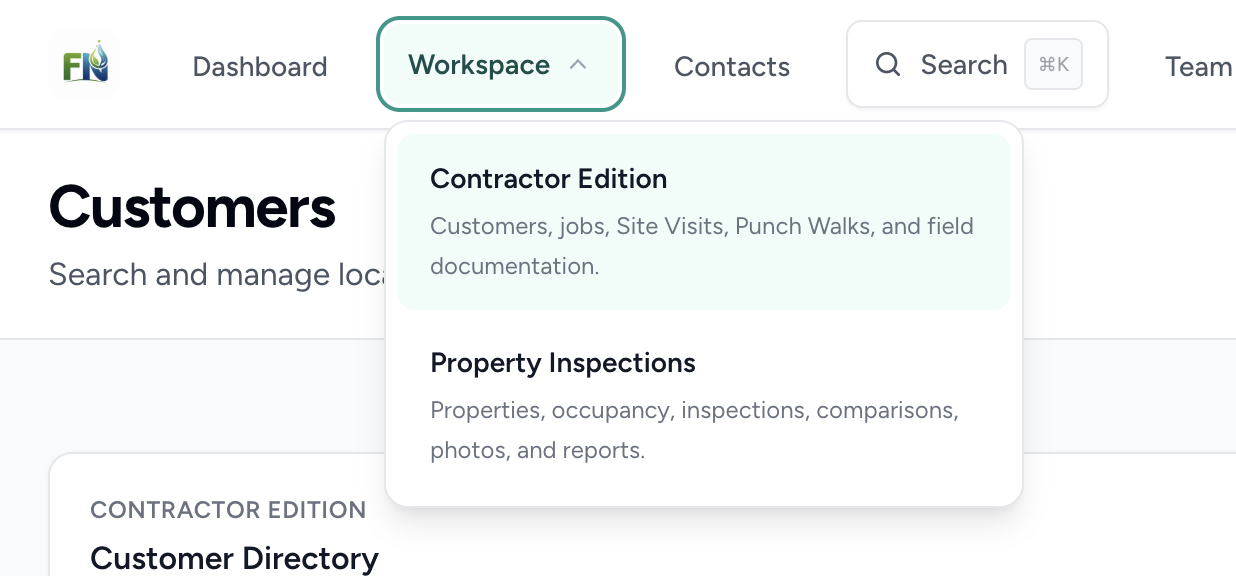
Helpful tip Use a recognizable customer or business name so your team can find the right records later.
STEP 2 OF 12
Enter the customer information
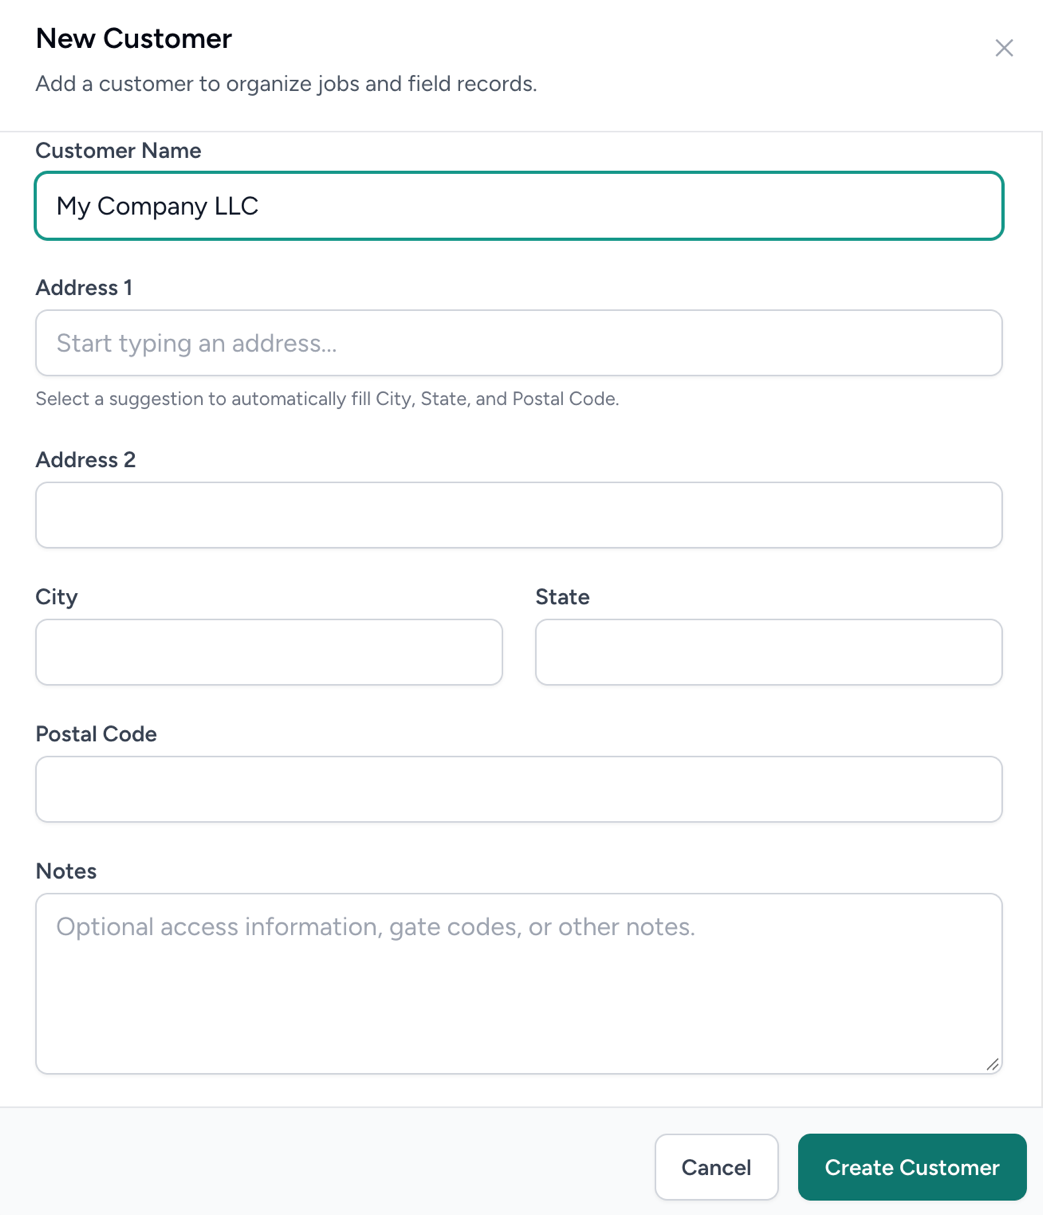
Complete the New Customer form, then select Create Customer.
- Customer Name: enter the business, client, owner, or account name.
- Address: begin typing and select a suggestion when available.
- City, State, and Postal Code: confirm the location details.
- Notes: add useful customer or site context appropriate for your organization.
FieldNovi opens the Customer Workspace after the record is created.
STEP 3 OF 12
Get familiar with the Customer Workspace
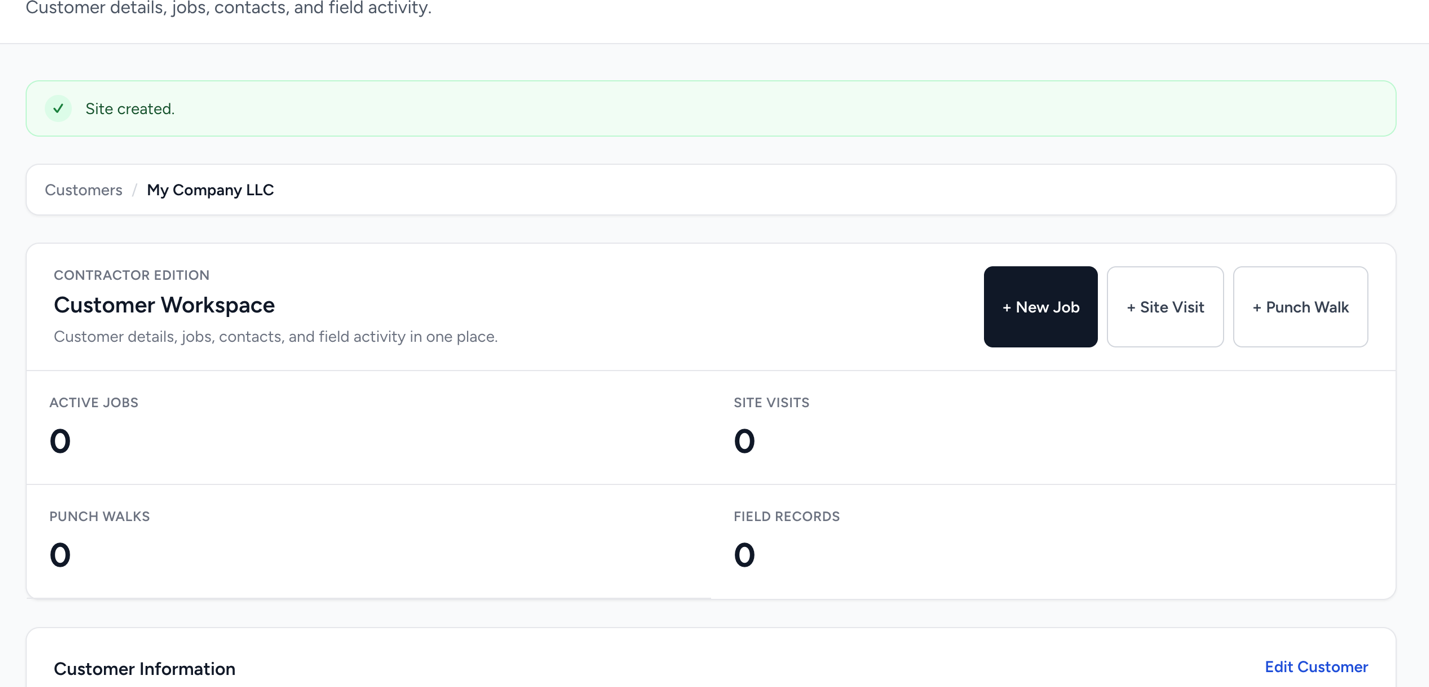
The Customer Workspace brings together jobs, Site Visits, Punch Walks, contacts, and field records for that customer.
Associate known report recipients with the customer or project during setup. This keeps recurring participants organized and makes sharing easier later.
Select + New Job to begin the project record.
STEP 4 OF 12
Create the job or project
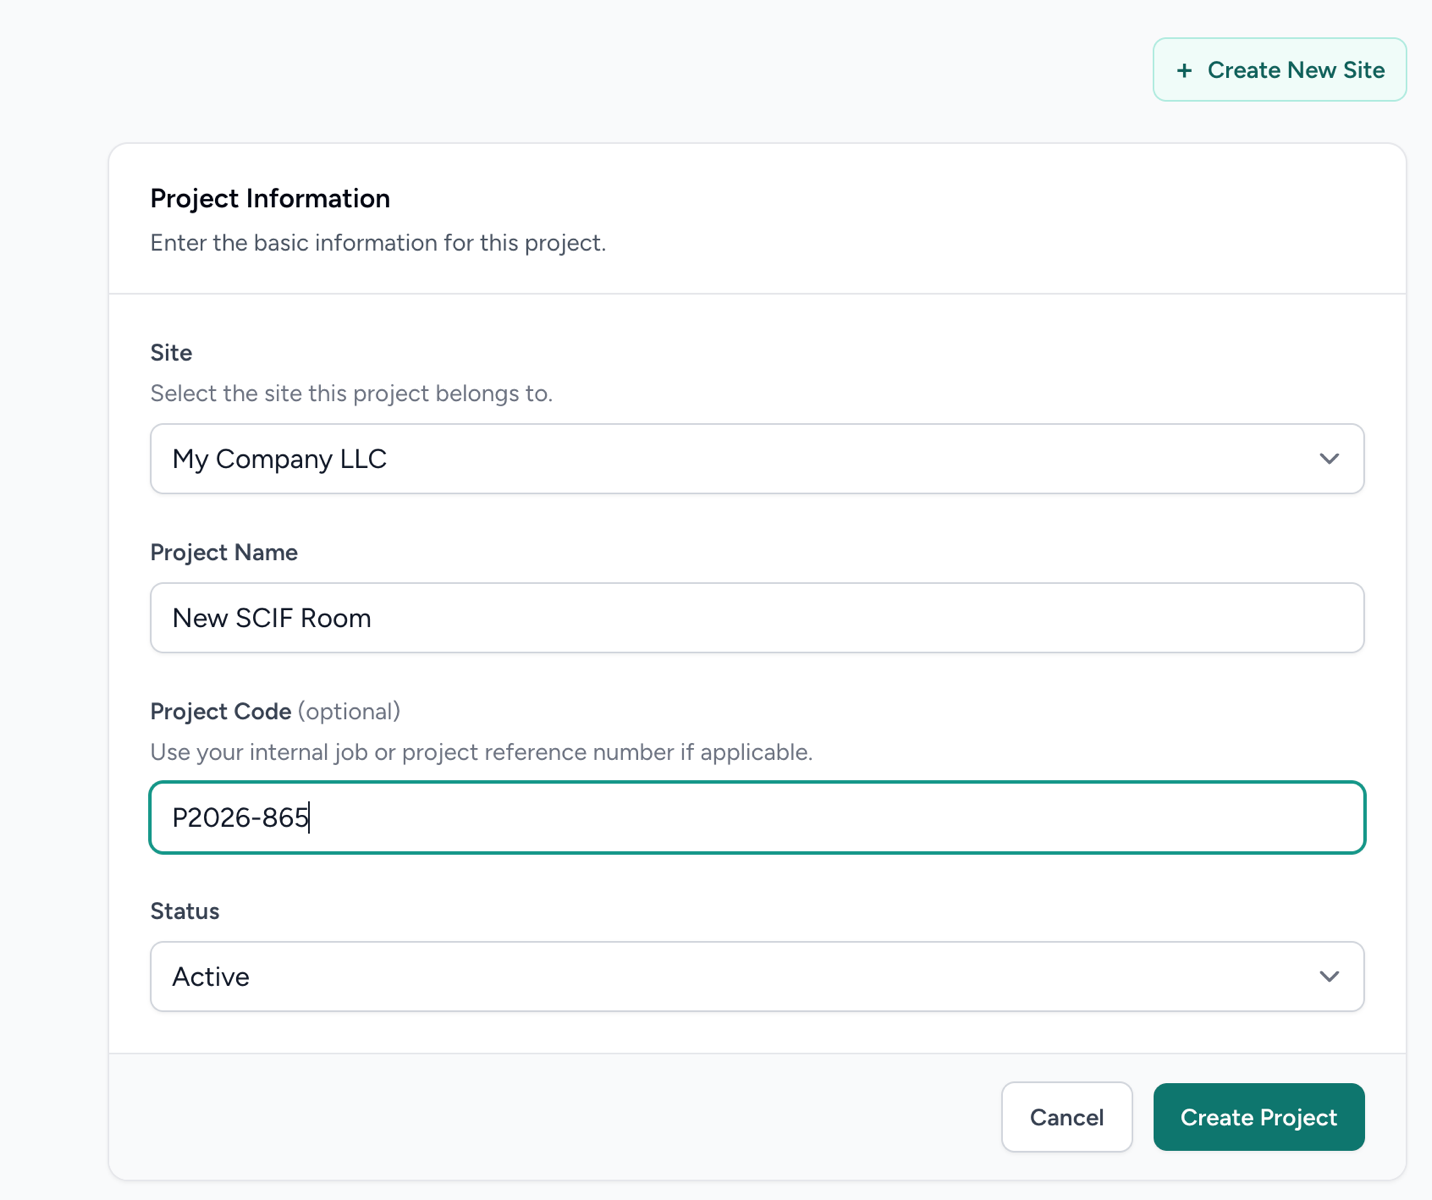
Enter the information that will organize field documentation for this work.
- Site: select the customer/location the project belongs to. Some screens use “Site” for this selection.
- Project Name: use a name your office and field team will recognize.
- Project Code: optionally enter your internal job number or reference.
- Status: choose the appropriate project status, such as Active.
Select Create Project. In the Job Workspace, use + Site Visit to start documenting a visit. The workspace also has a + Punch Walk action.
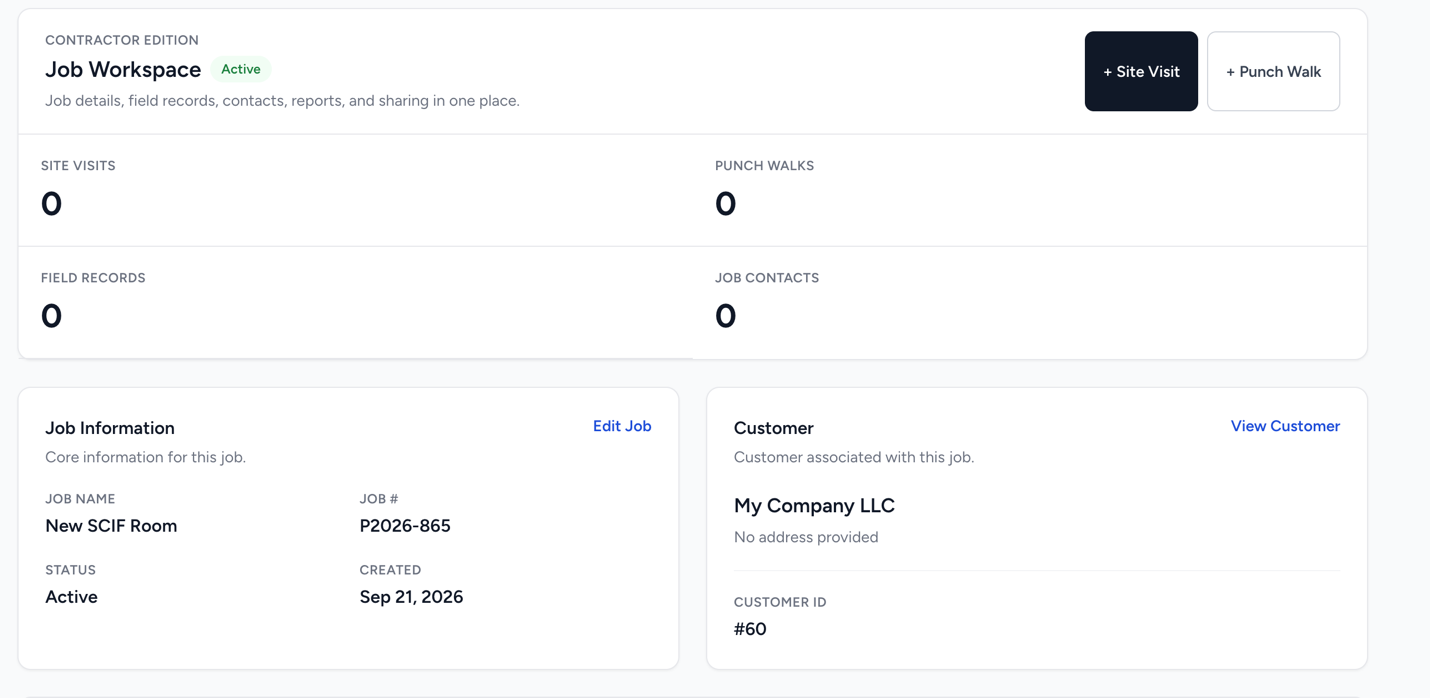
Helpful tip Use your company’s standard project names and job codes consistently.
STEP 5 OF 12
Create the Site Visit
From the Job Workspace, select + Site Visit and complete the visit details.
- Site and Project: confirm the correct customer/location and job.
- Visit Date: use the actual date of the field visit.
- Status: use Draft while you are collecting or reviewing documentation.
- Site Activity: summarize the work or activity observed during the visit.
- Additional Details: expand this section for optional title, weather, issues, observations, or notes.
Select Create Site Visit to open its workspace.
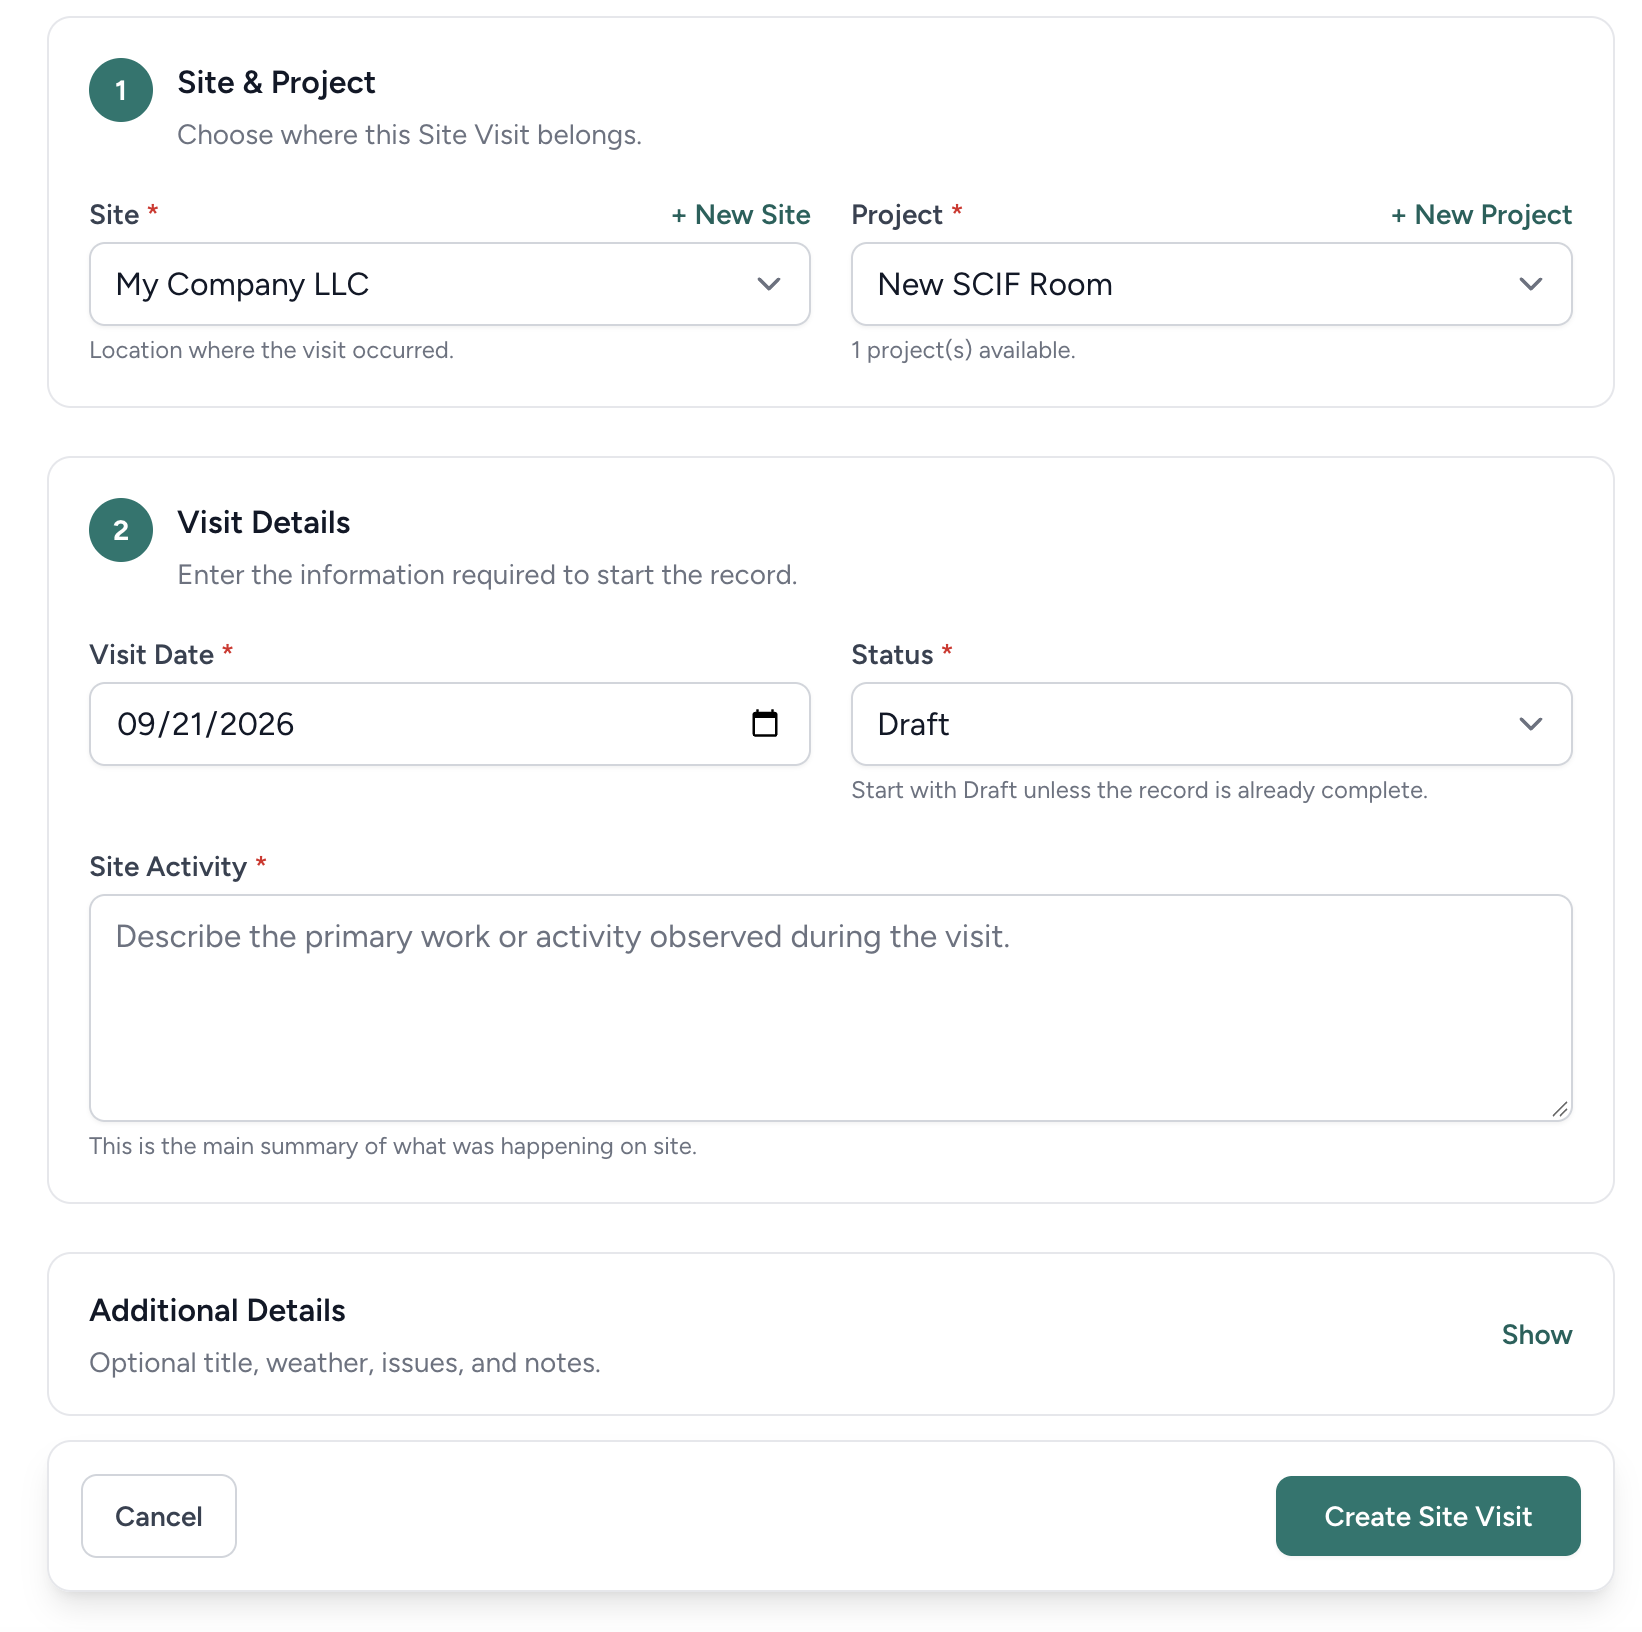
Helpful tip Write enough detail that someone can understand what happened, where it happened, and what was observed months later.
STEP 6 OF 12
Work inside the Site Visit
The Site Visit Workspace keeps the field record and its reporting tools together.
- + Add Media: upload photos, videos, and 360° photos.
- Edit Visit: correct or update the visit details.
- Share: create read-only access for recipients.
- PDF: preview or create a file copy of the report.
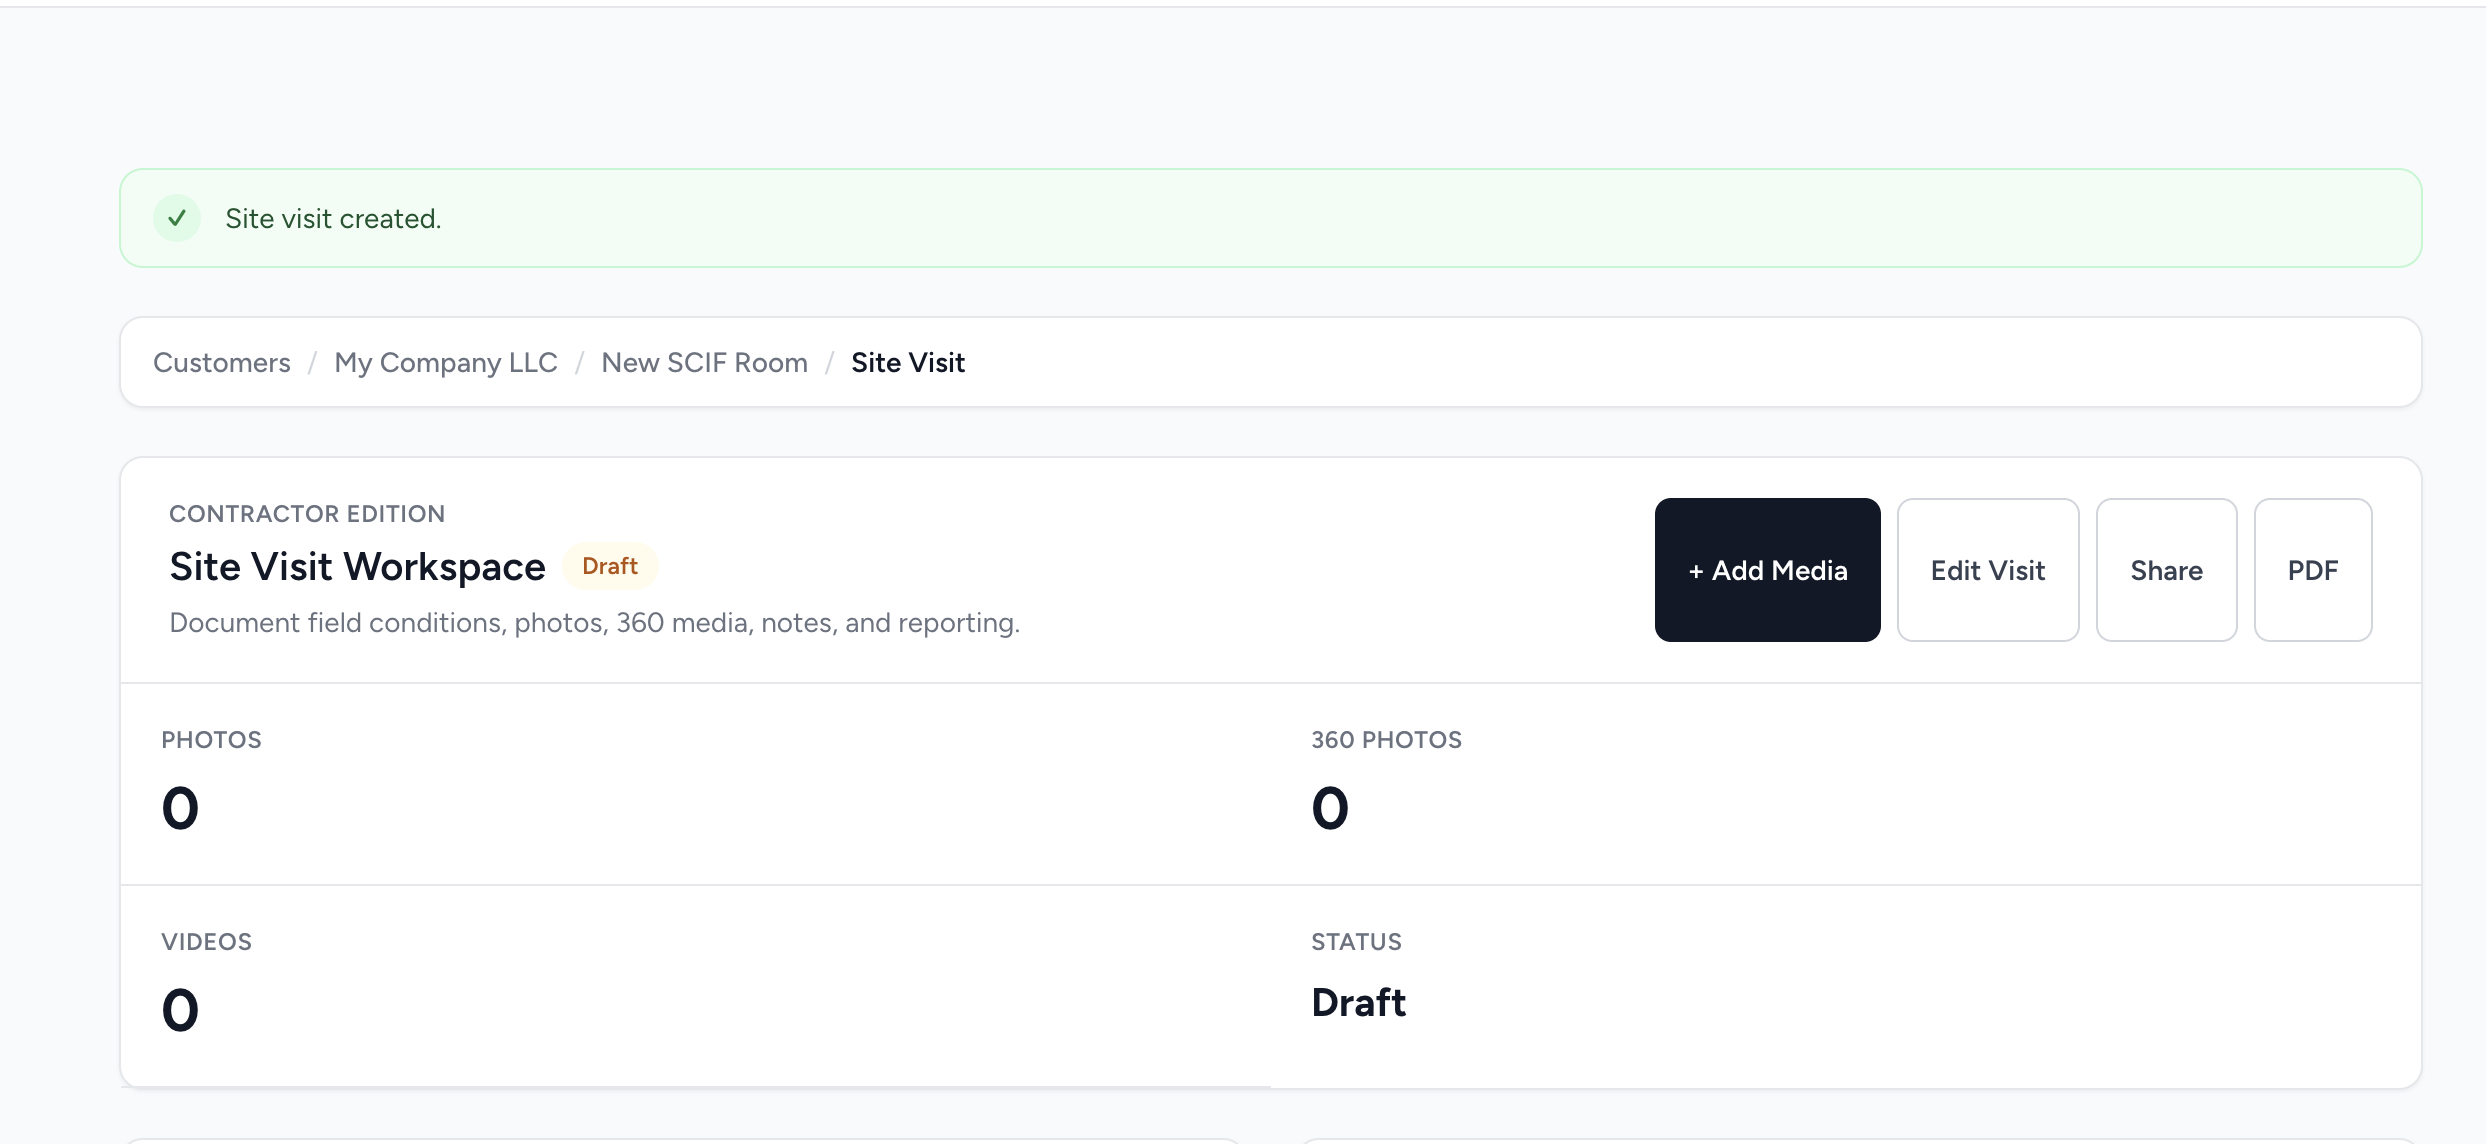
Helpful tip Keep the record and supporting media together so important documentation does not remain only on one phone or tablet.
STEP 7 OF 12
Add and organize field media
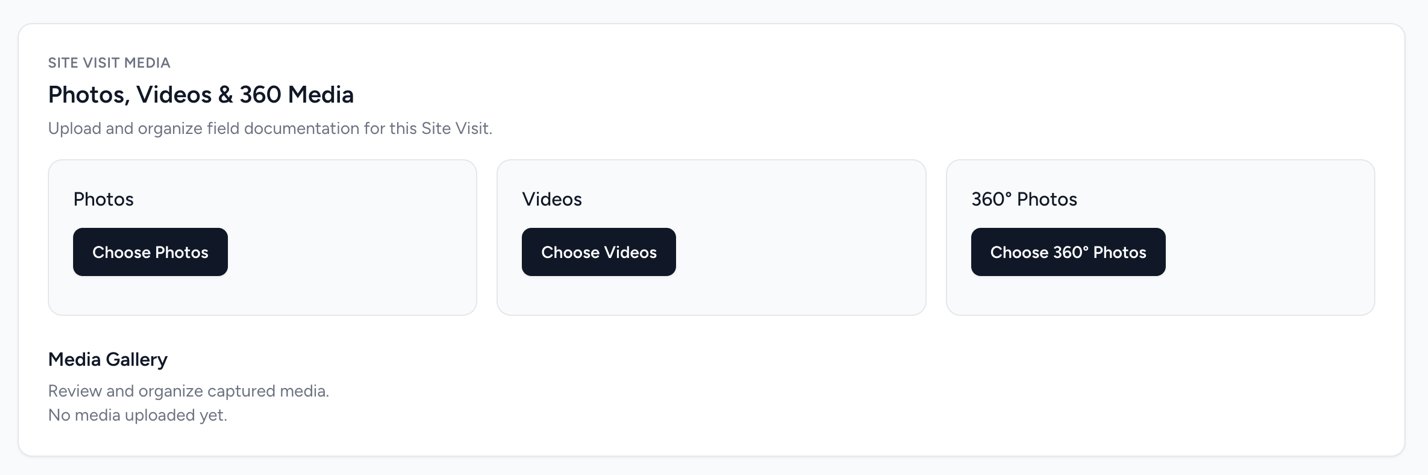
Select + Add Media, then choose the button that matches your file type.
- Photos: standard field images and close-up details.
- Videos: motion, sound, sequence, or a walkthrough.
- 360° Photos: a complete visual record of the surrounding area.
After uploading, open each important media item and give it a descriptive label. Include the room, floor, equipment, direction, grid reference, or issue as appropriate.
Helpful tip “2nd Floor – Column K12 – looking north” will be easier to understand later than “IMG_4821.”
STEP 8 OF 12
Share the Site Visit
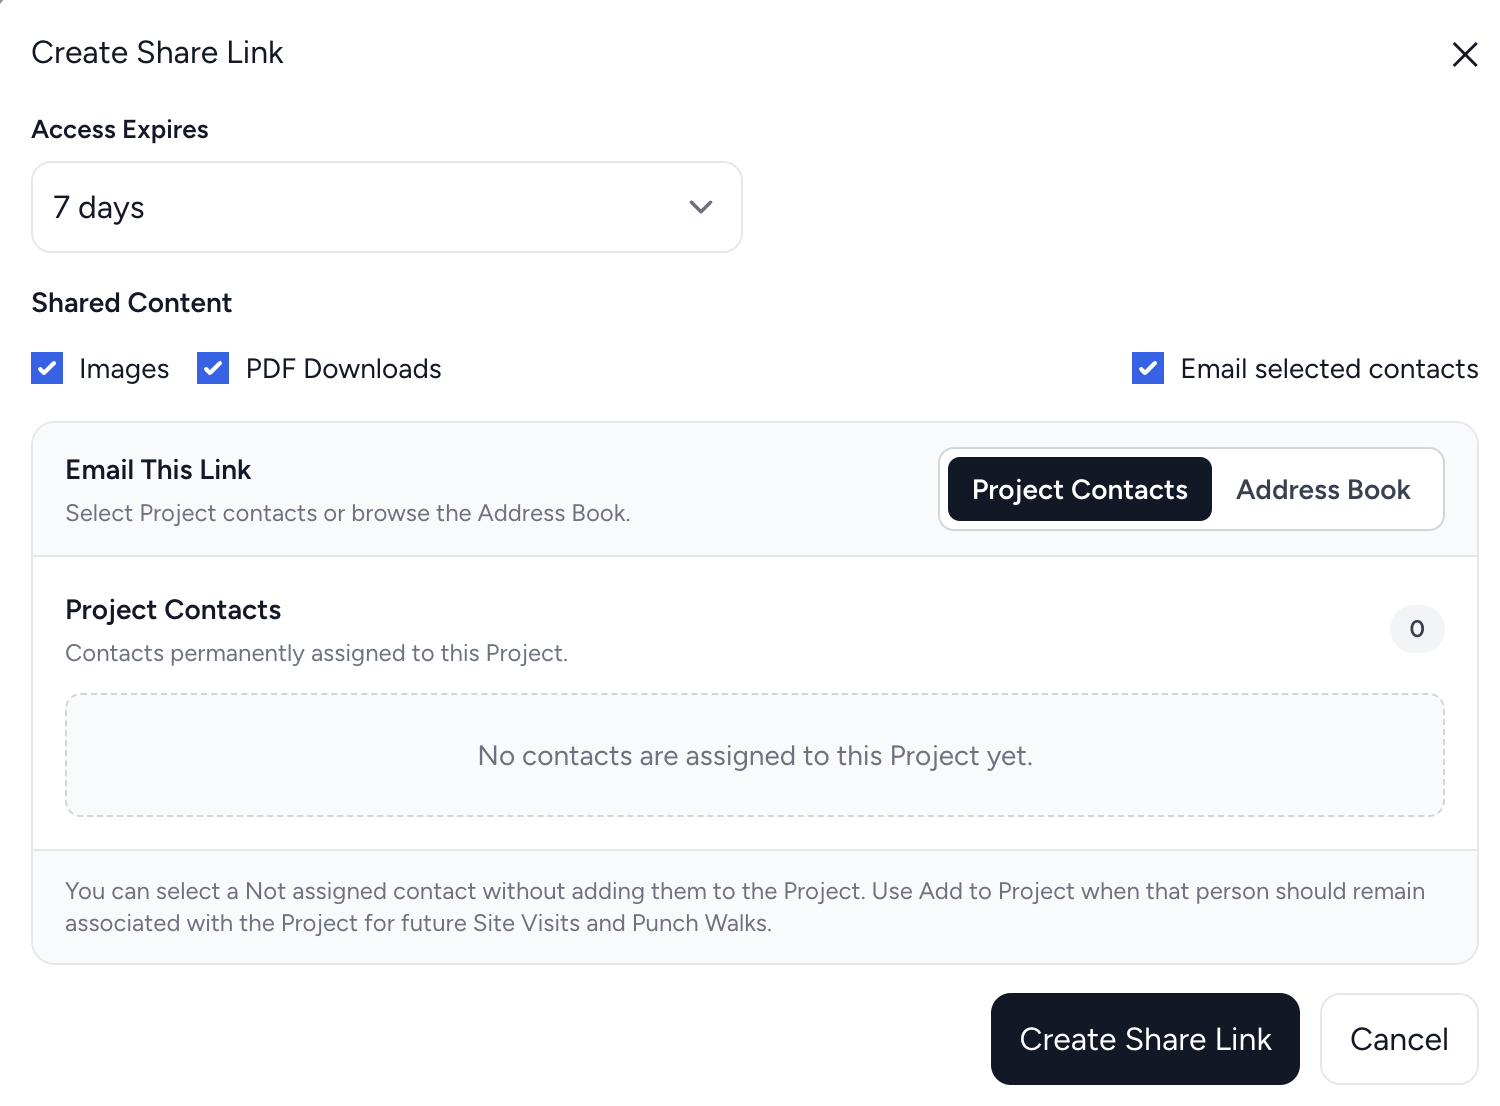
Select Share in the Site Visit Workspace to open Create Share Link.
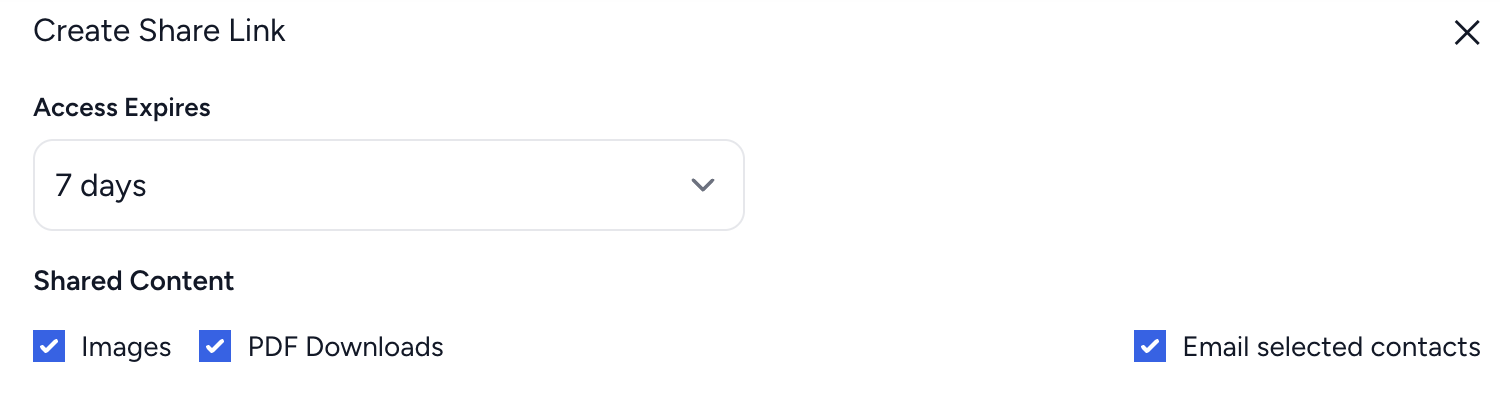
- Access Expires: choose how long access should remain active.
- Images: allow recipients to view the shared images.
- PDF Downloads: allow a downloadable copy when appropriate.
- Email selected contacts: leave this checked when you want FieldNovi to send the share email to the contacts you select.
Shared links provide read-only access. Recipients can review the report but cannot edit the underlying FieldNovi record.
STEP 9 OF 12
Choose who receives the report
Select the recipients who should receive this Site Visit.
- Project Contacts: choose people already associated with this project.
- Address Book: search active contacts by name, business, or email when a person is not yet assigned to the project.
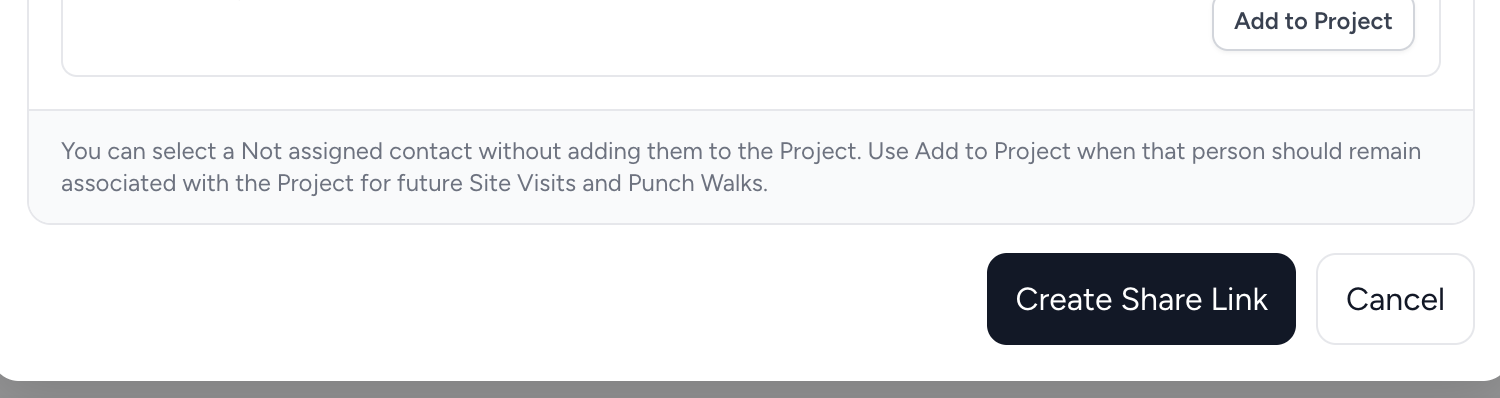
- Add to Project: keep a contact associated with this project for future Site Visits and Punch Walks.
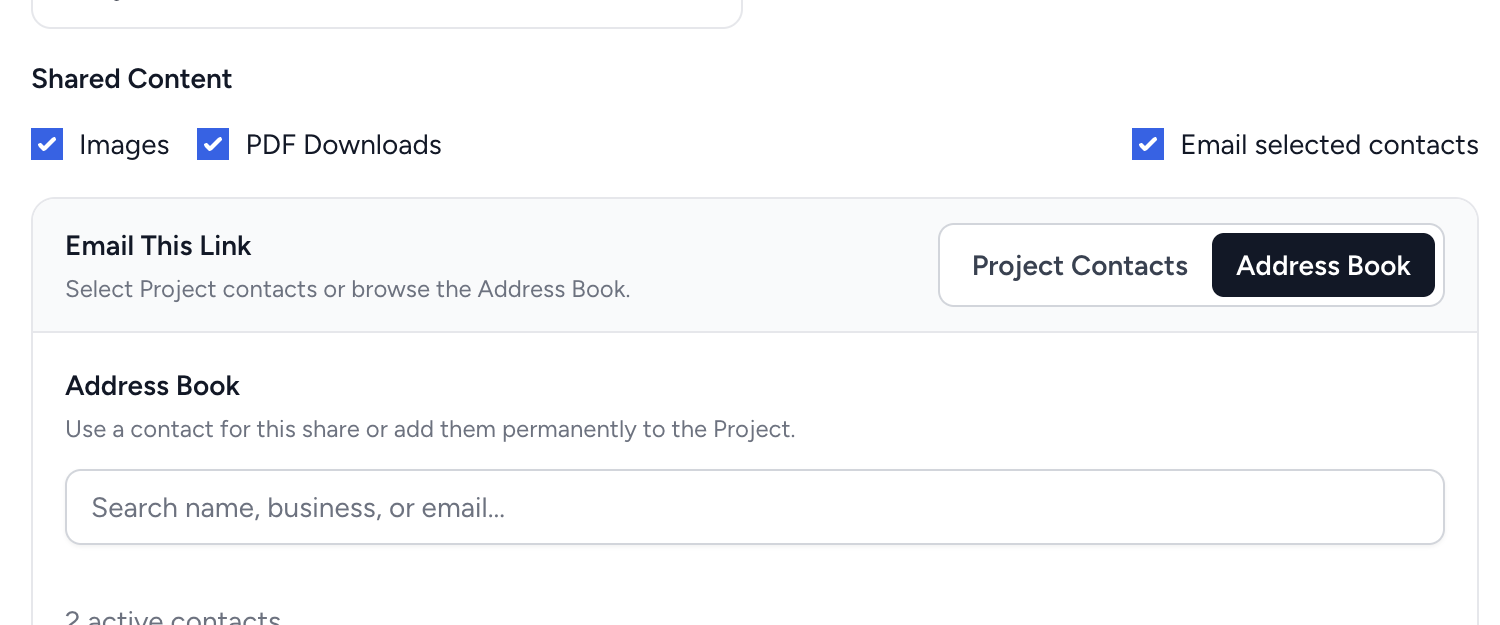
Helpful tip You can select an unassigned contact for this share without permanently adding them to the project. Use Add to Project for recurring recipients.
STEP 10 OF 12
Confirm permissions and create the link
Before selecting Create Share Link, check the expiration, image visibility, PDF download permission, selected contacts, and whether Email selected contacts is enabled.
When everything is ready, select Create Share Link.
Helpful tip A quick review helps the recipient get the right report with the access and time period you intended.
STEP 11 OF 12
Know what the recipient receives
When email delivery is enabled, FieldNovi sends the recipient a message with an Open Site Visit Report button.
The email includes the Site Visit date, link expiration, whether images are available, and a PDF download option when allowed. It also includes a fallback link and support@fieldnovi.com for questions about accessing the report.
EXAMPLE RECIPIENT EMAIL
A Site Visit report has been shared with you
Hello,
You’ve received read-only access to a Site Visit report in FieldNovi. Review the photos, notes, observations, and report details.
- Site Visit date
- The date of your visit
- Link expires
- The expiration you selected
- Images
- Available when enabled
A PDF download option appears when allowed. The email also includes a fallback link and contact information for Support.
Illustration only. This example contains no active share link.
STEP 12 OF 12
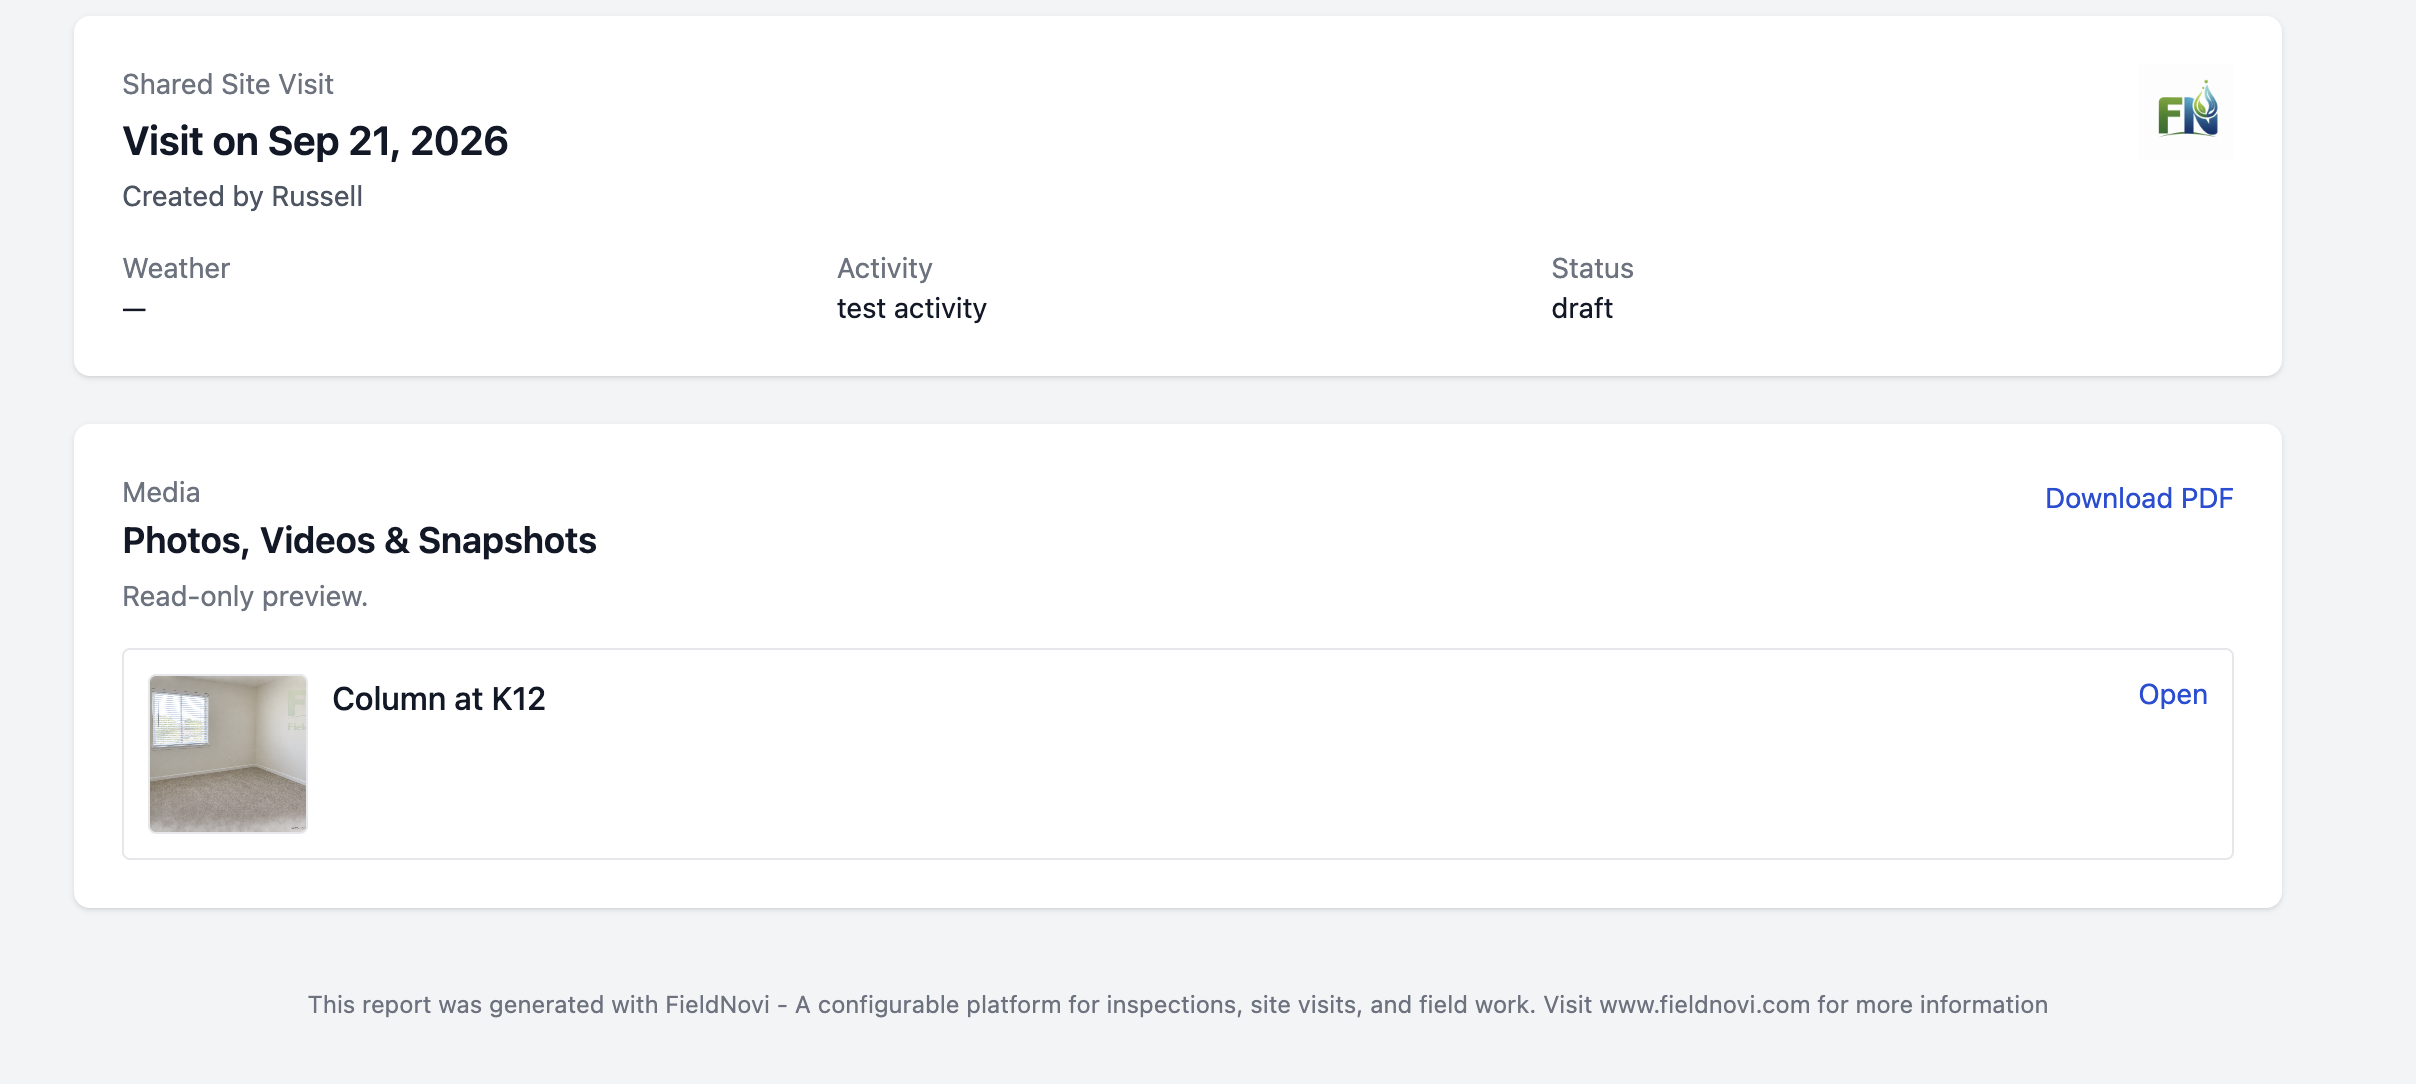
Understand the read-only report
The recipient opens a read-only version of the shared Site Visit. It contains the visit details and the media you allowed.
If PDF Downloads is enabled, the recipient can download a copy from the shared page. The shared view gives the recipient access to the report without navigating your internal workspace.
GOOD HABITS
Best practices
- Name projects consistently. Include your project or job code when available.
- Describe the work. Site Activity should explain what was happening on site.
- Label important media. Add location, direction, room, floor, grid, equipment, or issue details.
- Keep recurring recipients on the project. Project Contacts can be reused for future Site Visits and Punch Walks.
- Choose sharing permissions intentionally. Review the expiration, image visibility, and PDF access before creating a link.
- Keep a useful record. Use the workspace and PDF report instead of relying only on photos stored on a device.
QUICK ANSWERS
Common questions
Why are there no Project Contacts?
Open the Address Book tab, search for the person, and select them for the share. Use Add to Project when they should remain associated with the job for future communication.
What if the recipient did not receive the email?
Confirm that the correct contact was selected and Email selected contacts was enabled. Ask the recipient to check spam or junk folders. If needed, create a new share link or email support@fieldnovi.com.
How do I replace an expired share link?
Return to the Site Visit, select Share, and create a new share link with a new Access Expires period. Send the new link to the recipient.
How can the recipient get a PDF copy?
Enable PDF Downloads when creating the share. You can also use PDF from the Site Visit Workspace to create a file copy.
How do I correct the Site Visit?
Open the Site Visit Workspace and select Edit Visit. Update the information, then recreate or resend the share if appropriate.
Can recipients edit the record?
No. Shared Site Visit links provide read-only access. Recipients can view the details and use the image and PDF permissions you enabled.
FIELDNOVI SUPPORT
Still need help?
Email support@fieldnovi.com for questions or anything that is not working as expected.
Include these details
- Your name and organization.
- The workspace and any relevant record names.
- What you were trying to do and what happened instead.
- Any error message and a screenshot, when possible.
- The approximate date and time the issue occurred.
Do not include passwords or payment card details.