
What you’ll learn
The Contacts directory keeps workspace contact information in one place. Review related records and use contacts when choosing recipients for a shared report.
- Open Contacts
- Find or create
- Edit details
- Review relationships
Before you begin
Select the correct workspace before opening Contacts. In a team workspace, contacts are shared with the team, and your changes affect that shared directory.
STEP 1 OF 4
Open Contacts in the right workspace
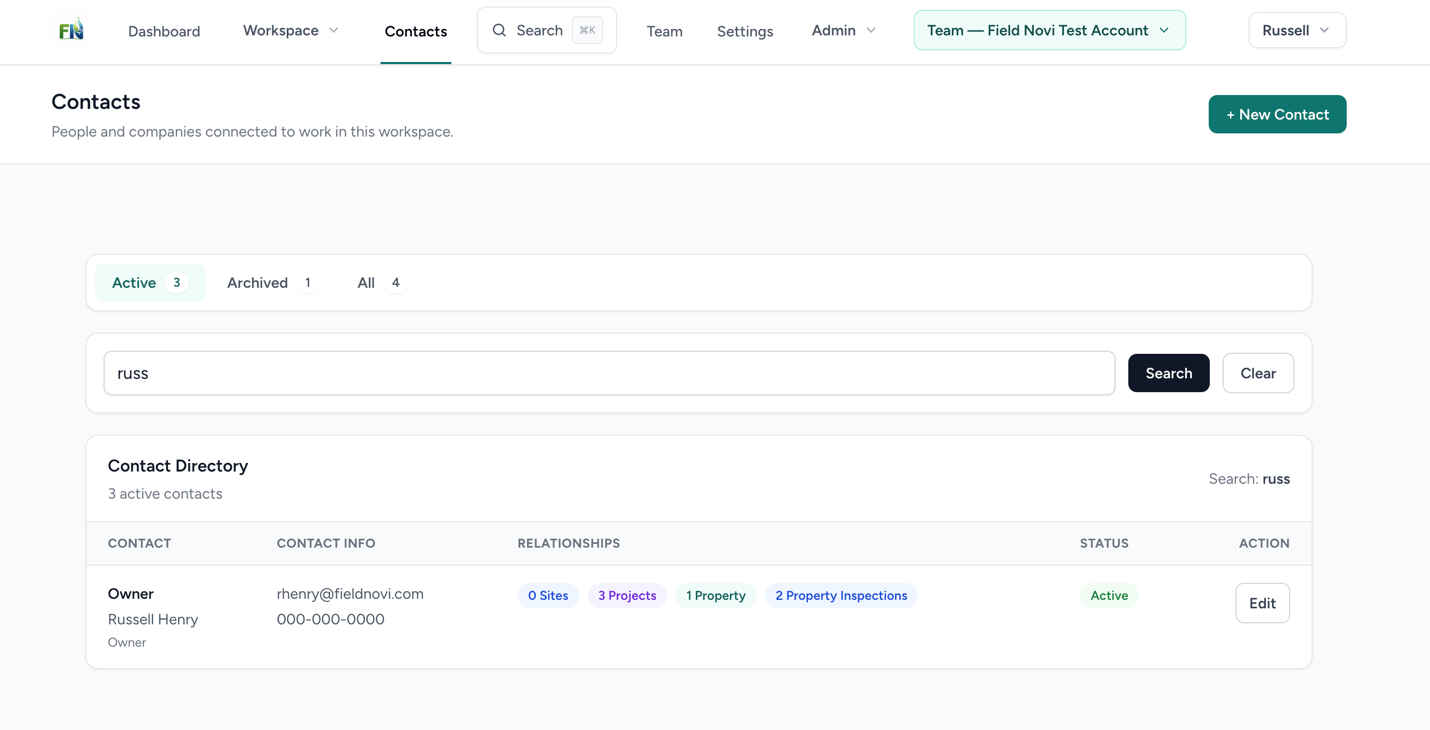
Select Contacts in the top navigation. Review the Active, Archived, and All views and use the directory search to find a person.
The Relationships counts show associated sites, projects, properties, and property inspections.
STEP 2 OF 4
Review and update a contact
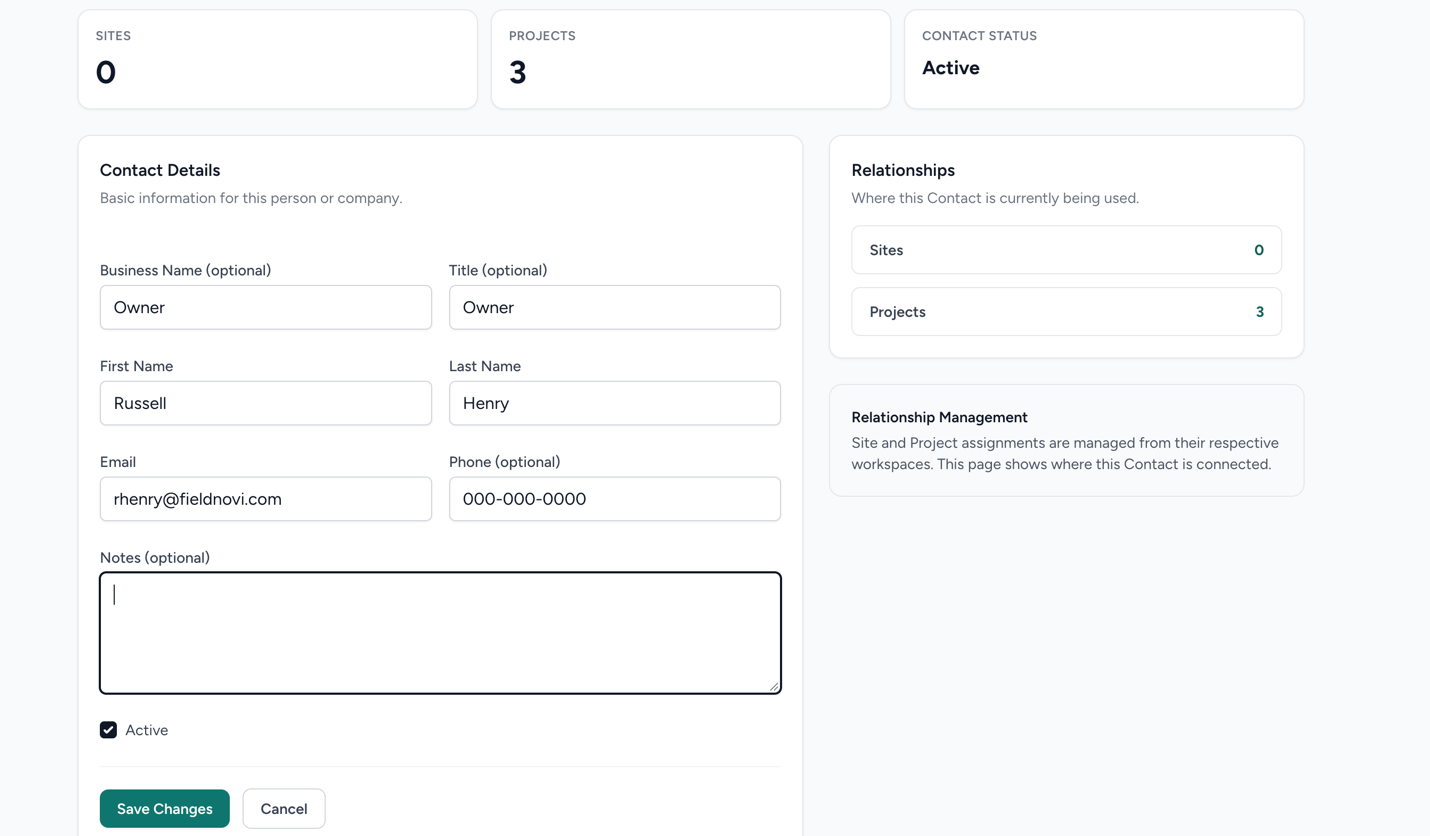
Find the person and select Edit. Update their name, email address, and other contact details as needed.
Use the Active setting to control whether the contact is active or archived, then select Save Changes.
Helpful tip Double-check email addresses before using a contact as a report recipient.
STEP 3 OF 4
Open associated records
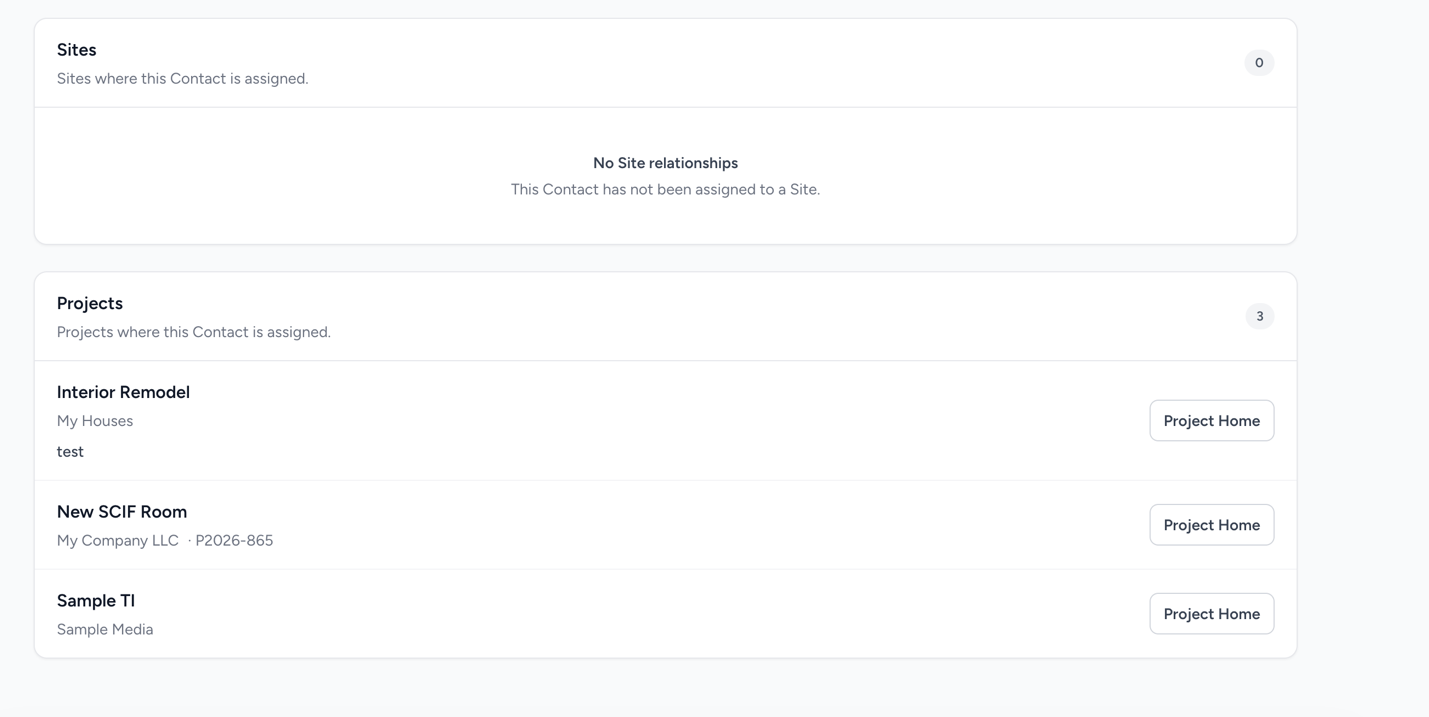
Review the contact’s relationship or association details. Select an associated record to open it.
To remove an association, open the relevant record and remove the contact from that record. A contact association helps organize relationships and choose report recipients; it does not grant team membership or account access.
STEP 4 OF 4
Add a new contact
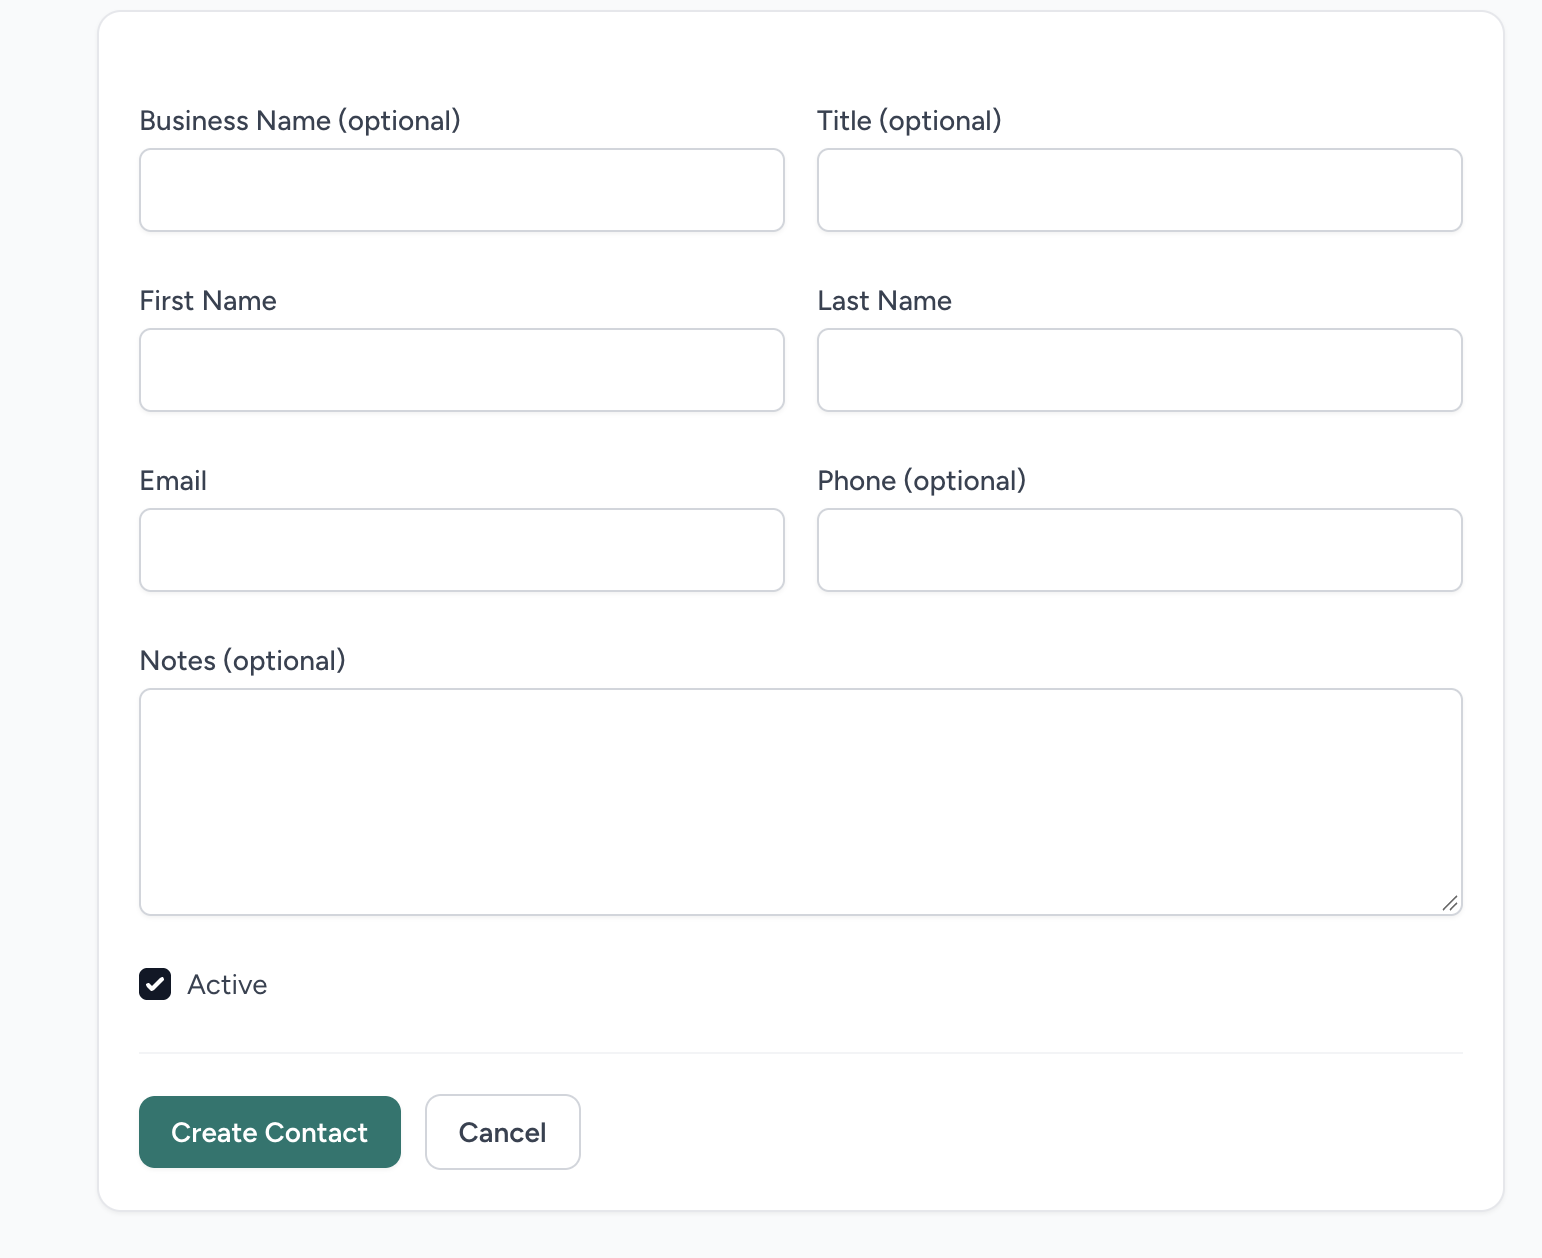
In the directory, select + New Contact. Enter the required First Name, Last Name, and Email, then add optional business, title, phone, and notes information as needed.
Review the contact’s Active setting and save the new contact.
GOOD HABITS
Best practices
- Search before adding a person to help avoid duplicates.
- Keep email addresses current so shared reports reach the intended person.
- Remember that edits in a team workspace update the shared contact directory.
QUICK ANSWERS
Common questions
Does adding a contact invite that person to my team?
No. Contacts and team members are separate. Use team invitations to grant workspace membership.
Why do I see different contacts after switching workspaces?
Each workspace has its own contact directory. Confirm the workspace selected in the top navigation.
How do I remove a contact from a project?
Open the associated project or record and remove the contact association there. You do not need to delete the contact from the directory to remove that relationship.
Where can I find an archived contact?
Use the Archived or All view in the Contacts directory, then open the contact to review its information and Active setting.
FIELDNOVI SUPPORT
Still need help?
Email support@fieldnovi.com for questions or anything that is not working as expected.
Include these details
- Your name and organization.
- The workspace and any relevant record names.
- What you were trying to do and what happened instead.
- Any error message and a screenshot, when possible.
- The approximate date and time the issue occurred.
Do not include passwords or payment card details.