
What you’ll learn
Team invitations connect an existing or new FieldNovi account to a team workspace. This guide covers both sending an invitation and accepting it.
- Invite
- Check email
- Activate / sign in
- Accept
- Open team
Before you begin
To invite someone, select the intended team workspace and use an account with access to team management. To join, use the exact email address that received the invitation.
STEP 1 OF 7
Open Manage team members
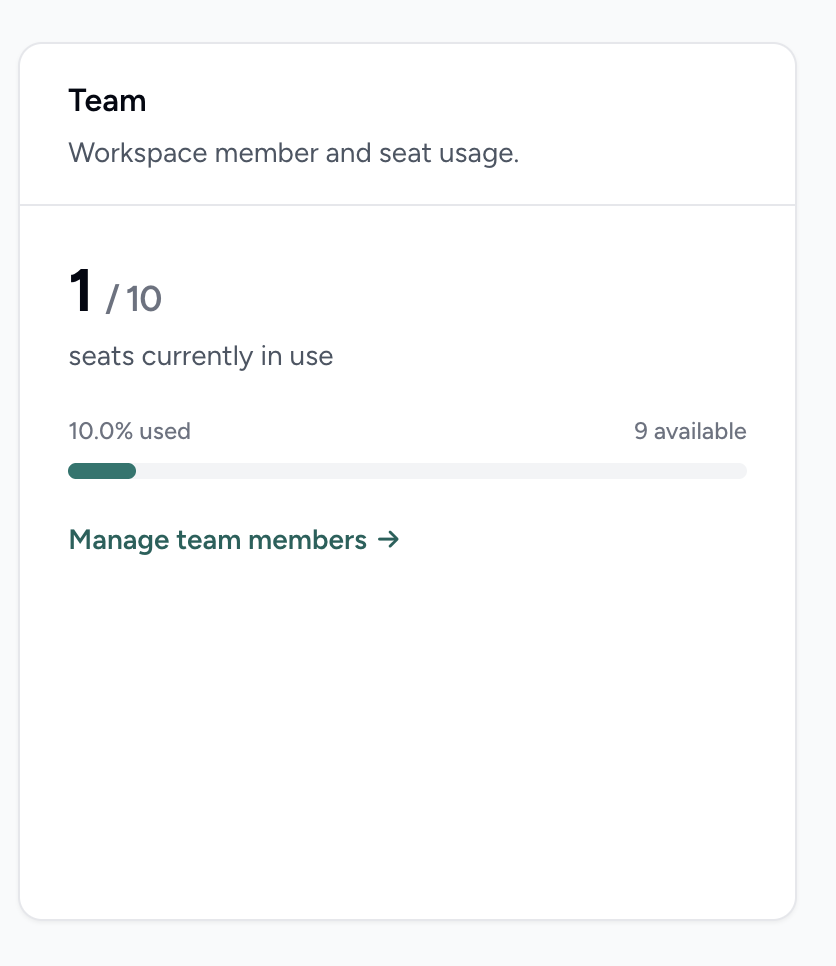
On the team workspace dashboard, find the Team usage card and select Manage team members. Check the current seat usage before inviting another person.
STEP 2 OF 7
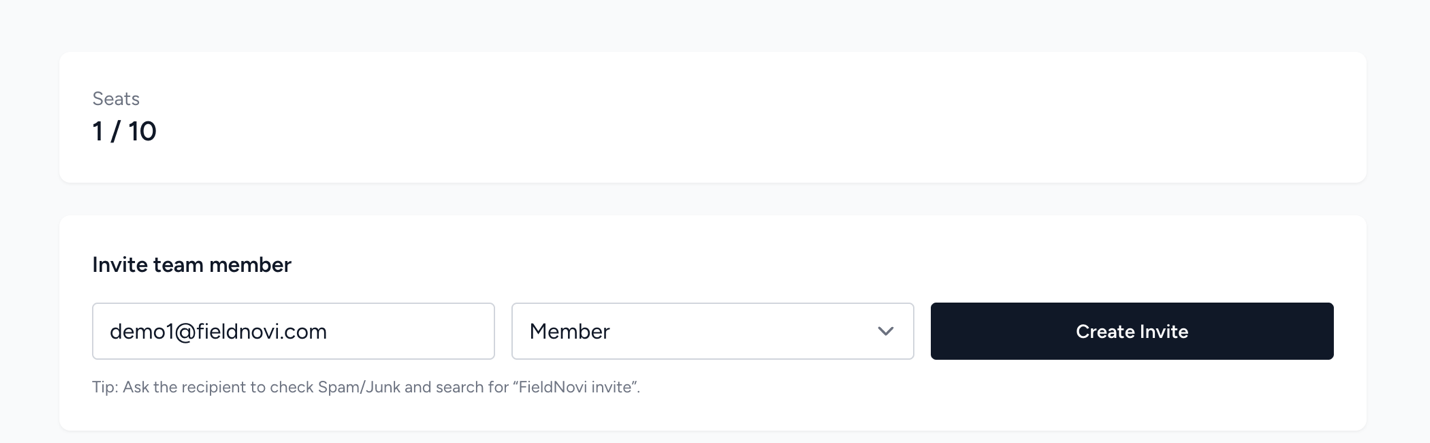
Enter the email address and choose a role
Enter the person’s email address and choose the appropriate role. Confirm the address carefully, then select Create Invite.
An Admin role provides elevated workspace permissions, including billing access. Give it only when needed. Permanent workspace deletion remains an owner-only action.
Use Pending invites to review invitations, resend an email, or revoke an invitation that should no longer be used.
STEP 3 OF 7
Find the FieldNovi team invitation email
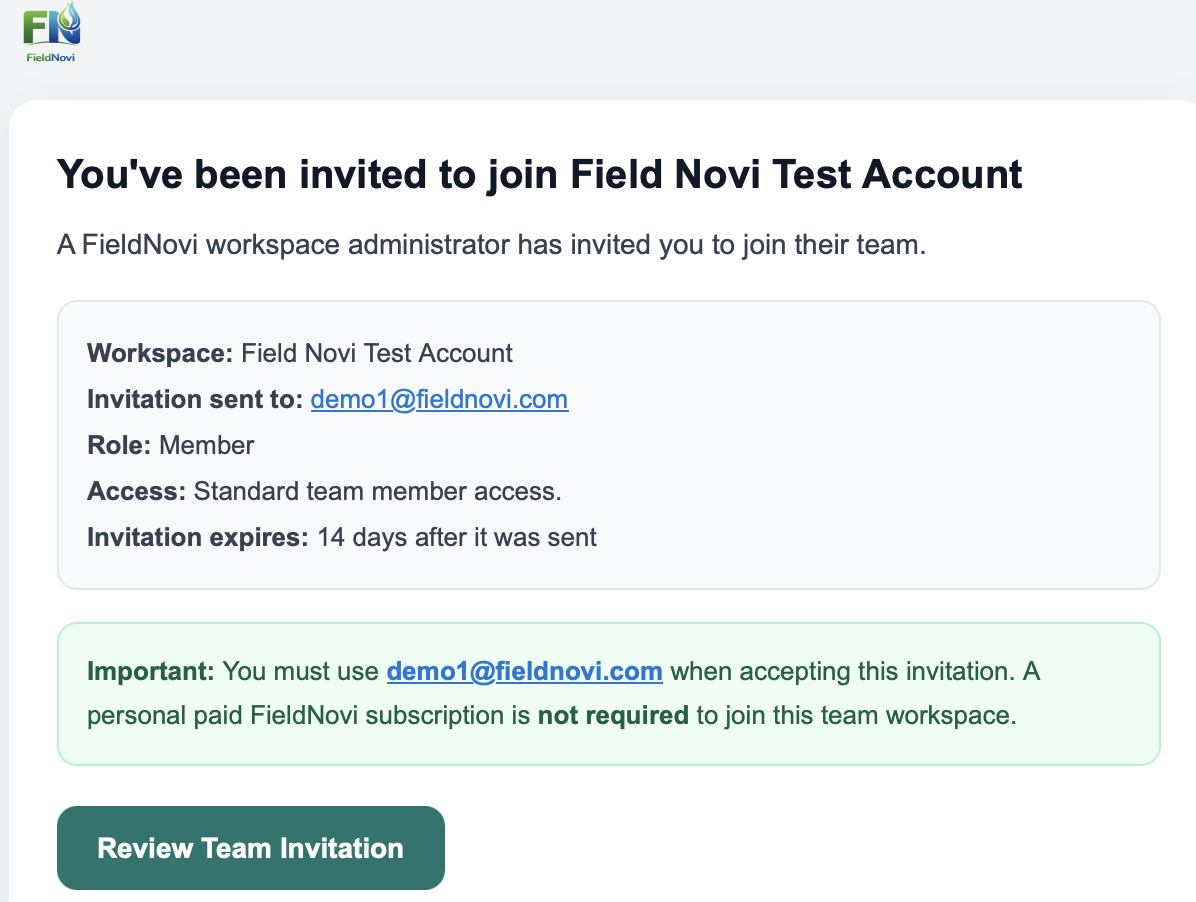
The recipient receives an email from noreply@fieldnovi.com. Check spam or junk if it is missing.
Review the workspace, invited email address, and role, then select Review Team Invitation. Invitations expire 14 days after they are sent.
STEP 4 OF 7
Prepare the account with the invited email
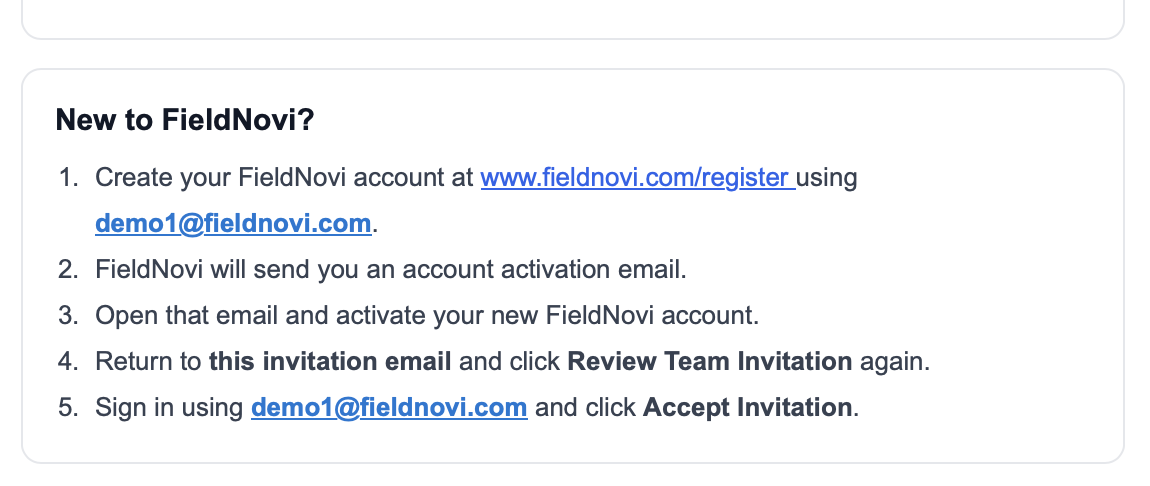
If you do not have a FieldNovi account, register using the same email address shown in the invitation and activate your account. The account setup guide explains these steps.
You do not need a paid personal subscription to join the team. Once your account is active, return to the invitation email and select Review Team Invitation again.
STEP 5 OF 7
Sign in with the invited account
If prompted, sign in with the account that matches the invitation email. If you are signed in to a different account, sign out and use the invited account before accepting.
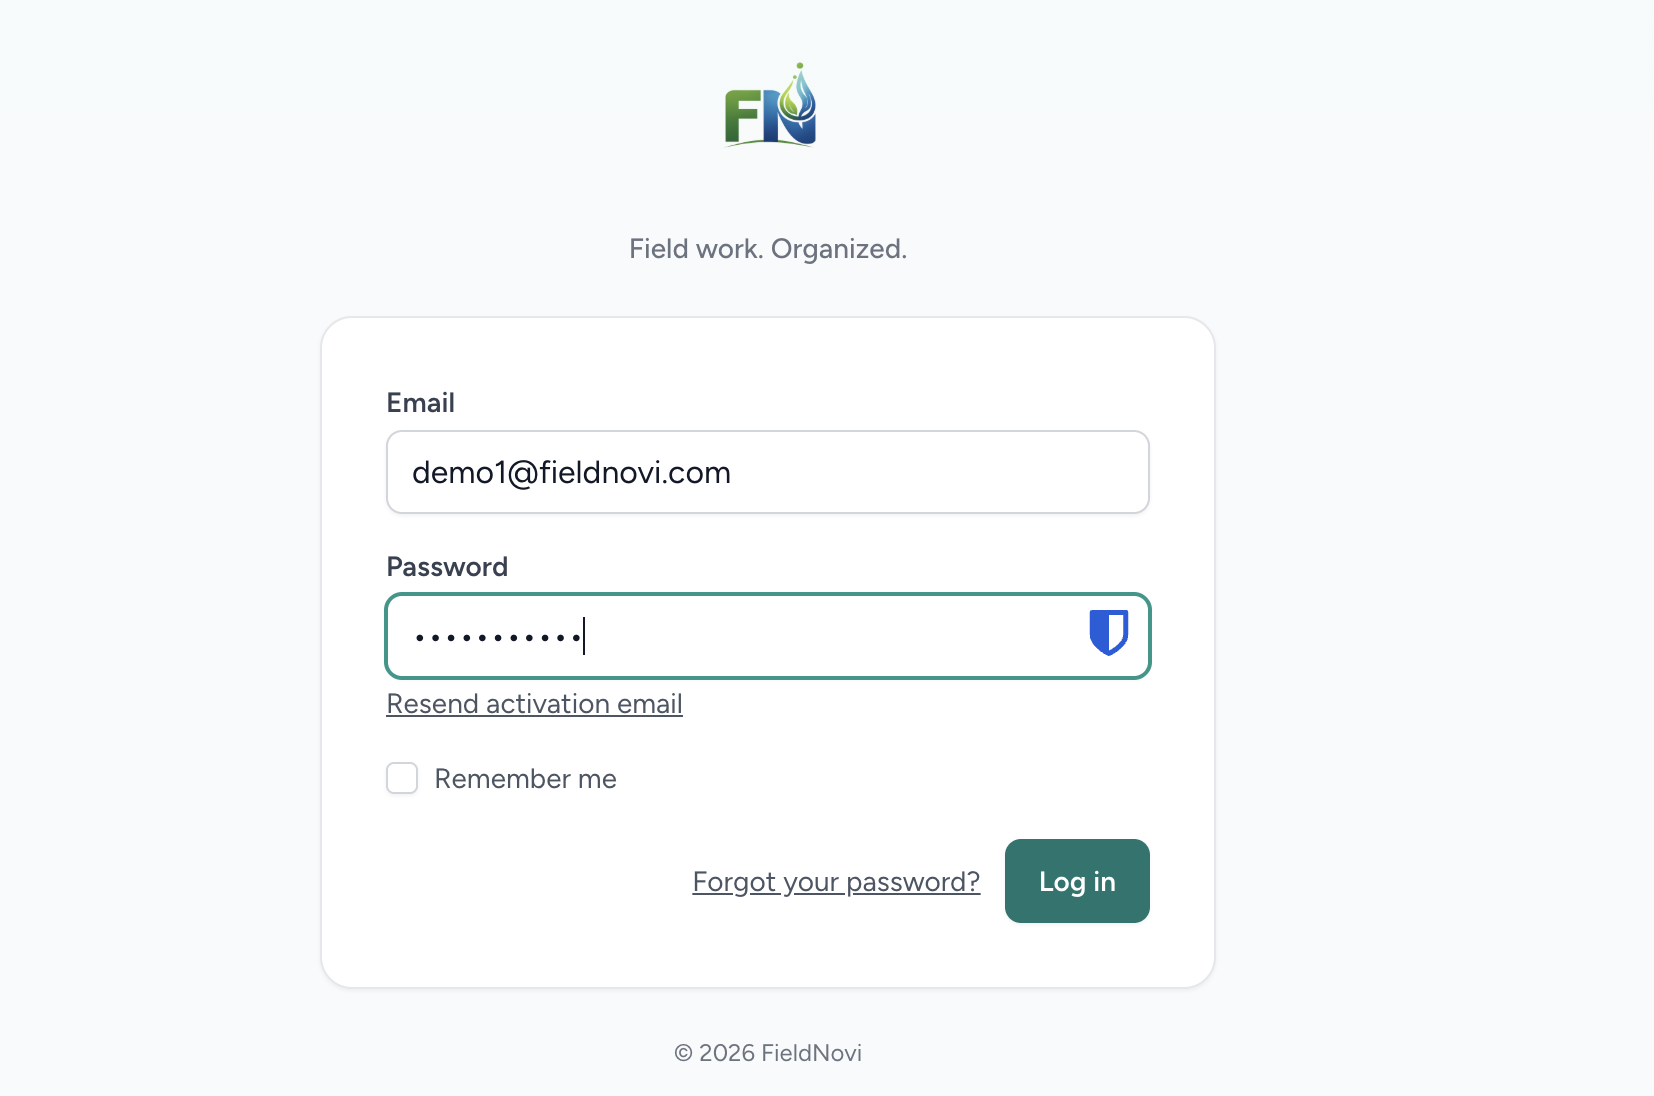
STEP 6 OF 7
Review the details and accept
Check the team name, invited email, and role on the invitation page. Select Accept Invitation to join, or Not Now if you are not ready.
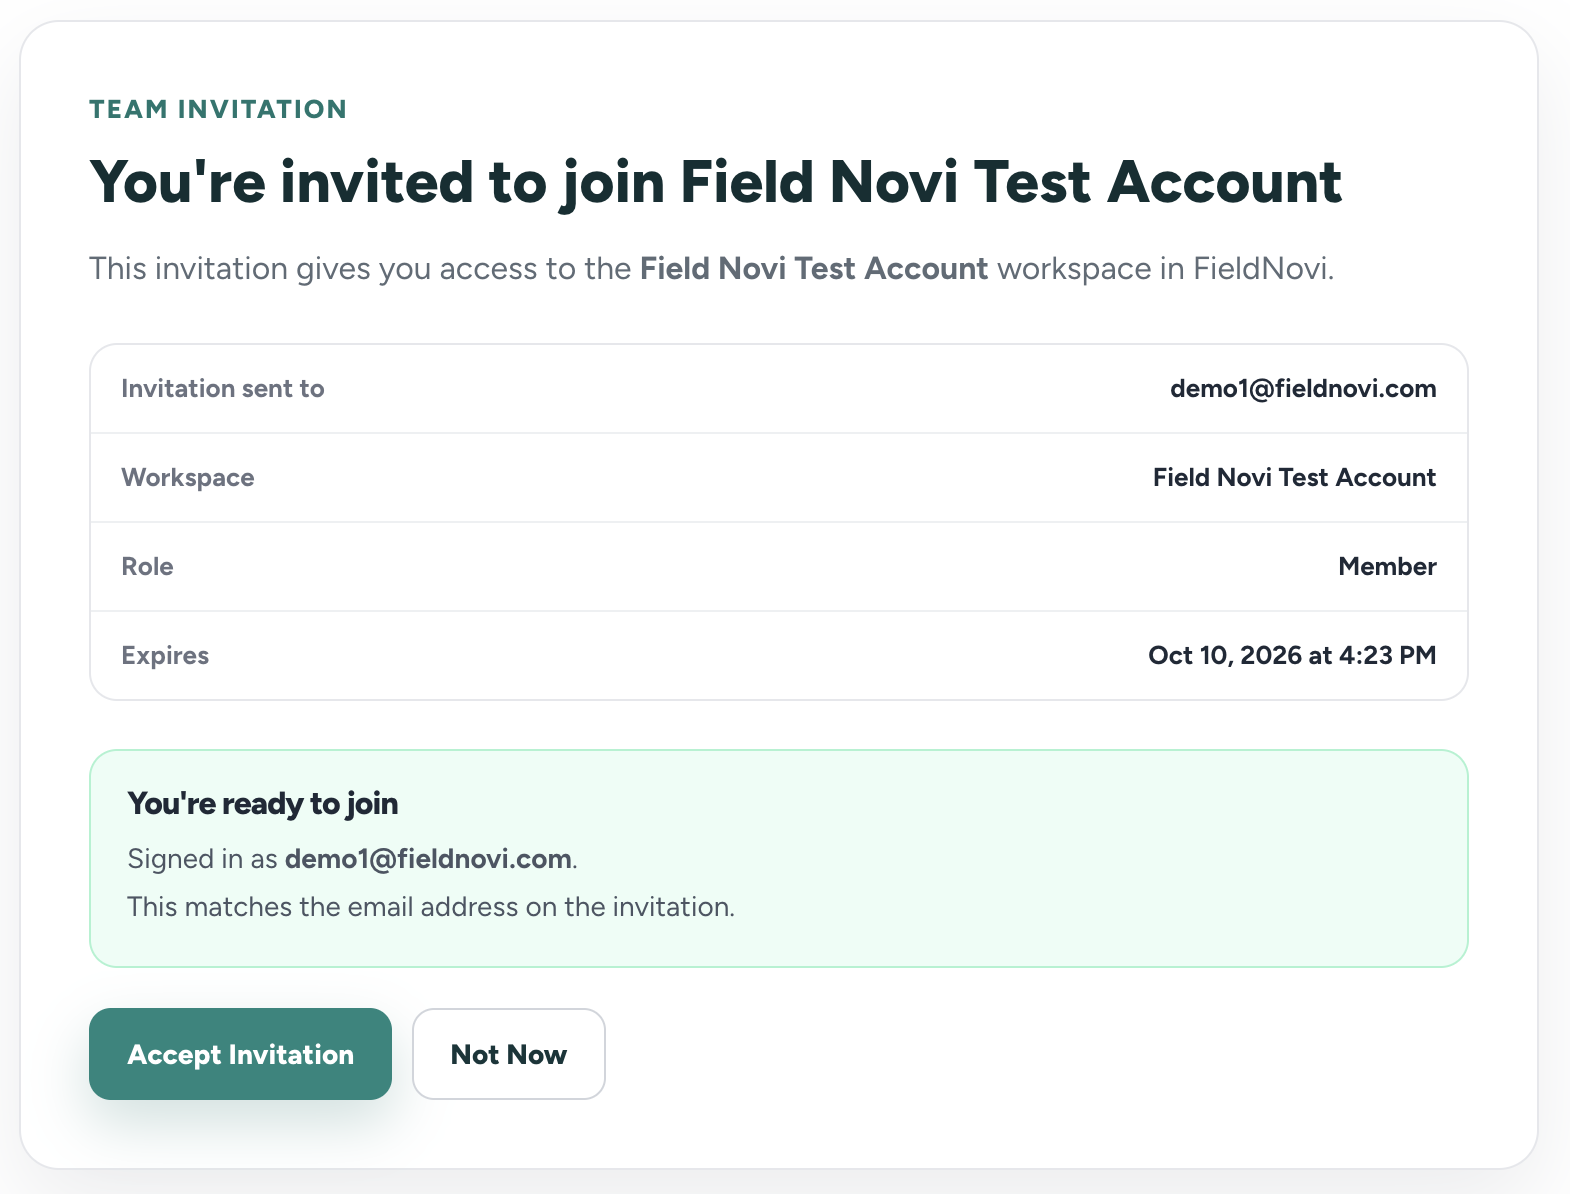
STEP 7 OF 7
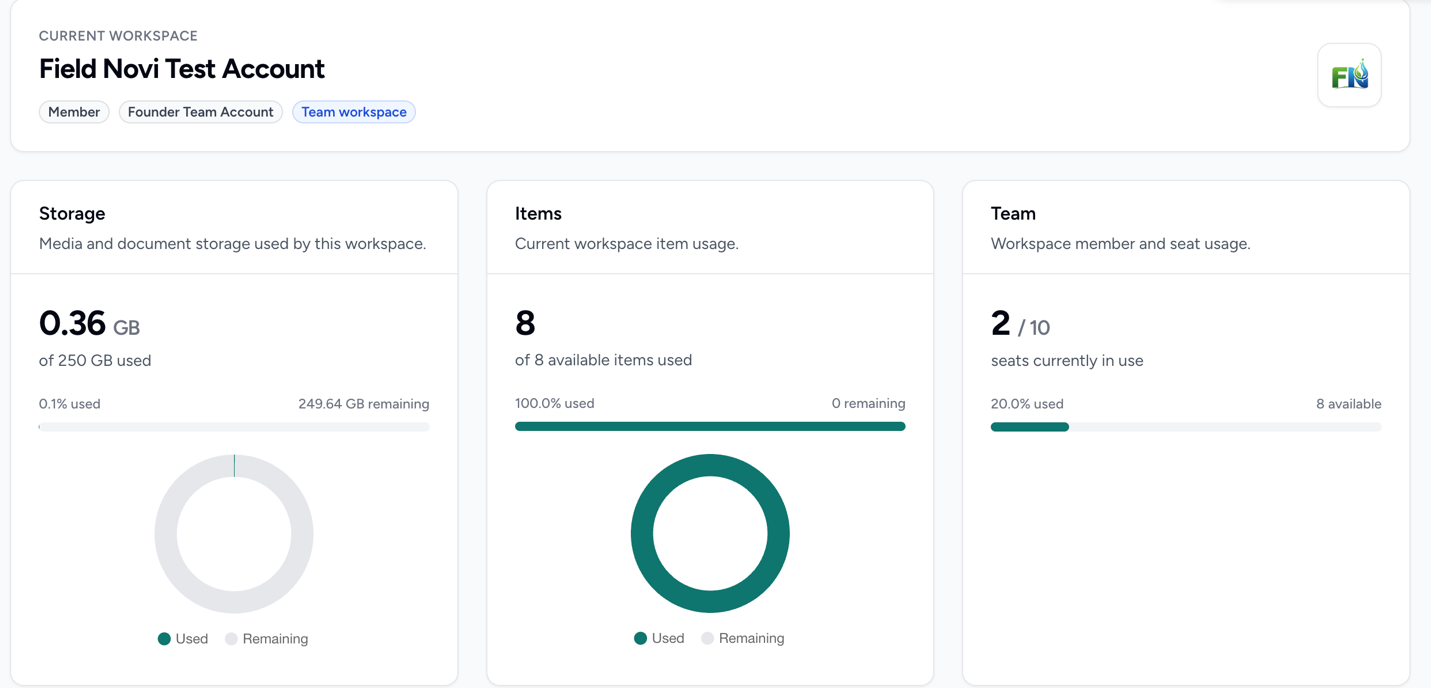
Confirm the team workspace on the dashboard
After accepting, confirm that the dashboard and workspace menu show the team you joined. You can use the workspace switcher to move between workspaces you belong to.
GOOD HABITS
Best practices
- Use the least elevated role needed for the person’s work.
- Review pending invitations and revoke those that are no longer needed.
- Confirm the workspace name after accepting an invitation.
QUICK ANSWERS
Common questions
Can I accept an invitation with a different email address?
No. Sign in or register with the exact email address that received the invitation. Ask the team administrator to send a new invitation if the address needs to change.
Do I need to buy a personal plan before joining?
No. An activated FieldNovi account with the matching email address is enough to accept a valid team invitation.
What if the invitation has expired?
Ask the person managing the team to review the pending invitation and resend or reissue it. Use the most recent invitation email.
Does an Admin role allow permanent workspace deletion?
No. The workspace data page identifies permanent deletion as owner-only. Admin access should still be assigned carefully because it provides elevated permissions.
Why don’t I see the team after registering?
Registering alone does not accept the invitation. Activate your account, return to the invitation email, review it, sign in with the invited email, and select Accept Invitation.
FIELDNOVI SUPPORT
Still need help?
Email support@fieldnovi.com for questions or anything that is not working as expected.
Include these details
- Your name and organization.
- The workspace and any relevant record names.
- What you were trying to do and what happened instead.
- Any error message and a screenshot, when possible.
- The approximate date and time the issue occurred.
Do not include passwords or payment card details.