
What you’ll learn
The dashboard gives you an overview of the selected workspace. Use it to check usage, return to recent work, and open the tools you use most.
- Select workspace
- Check settings
- Review usage
- Open your work
Before you begin
Sign in and confirm the workspace shown in the header. Available settings and team controls depend on your role and workspace plan.
STEP 1 OF 4
Update business information and your logo
From the dashboard, open the workspace Settings. Review the business name, contact details, and address used for your workspace and reports, then save your changes.
To add a logo, choose the image file and select Upload Logo. The form accepts PNG, JPG, or WEBP files up to 2 MB.
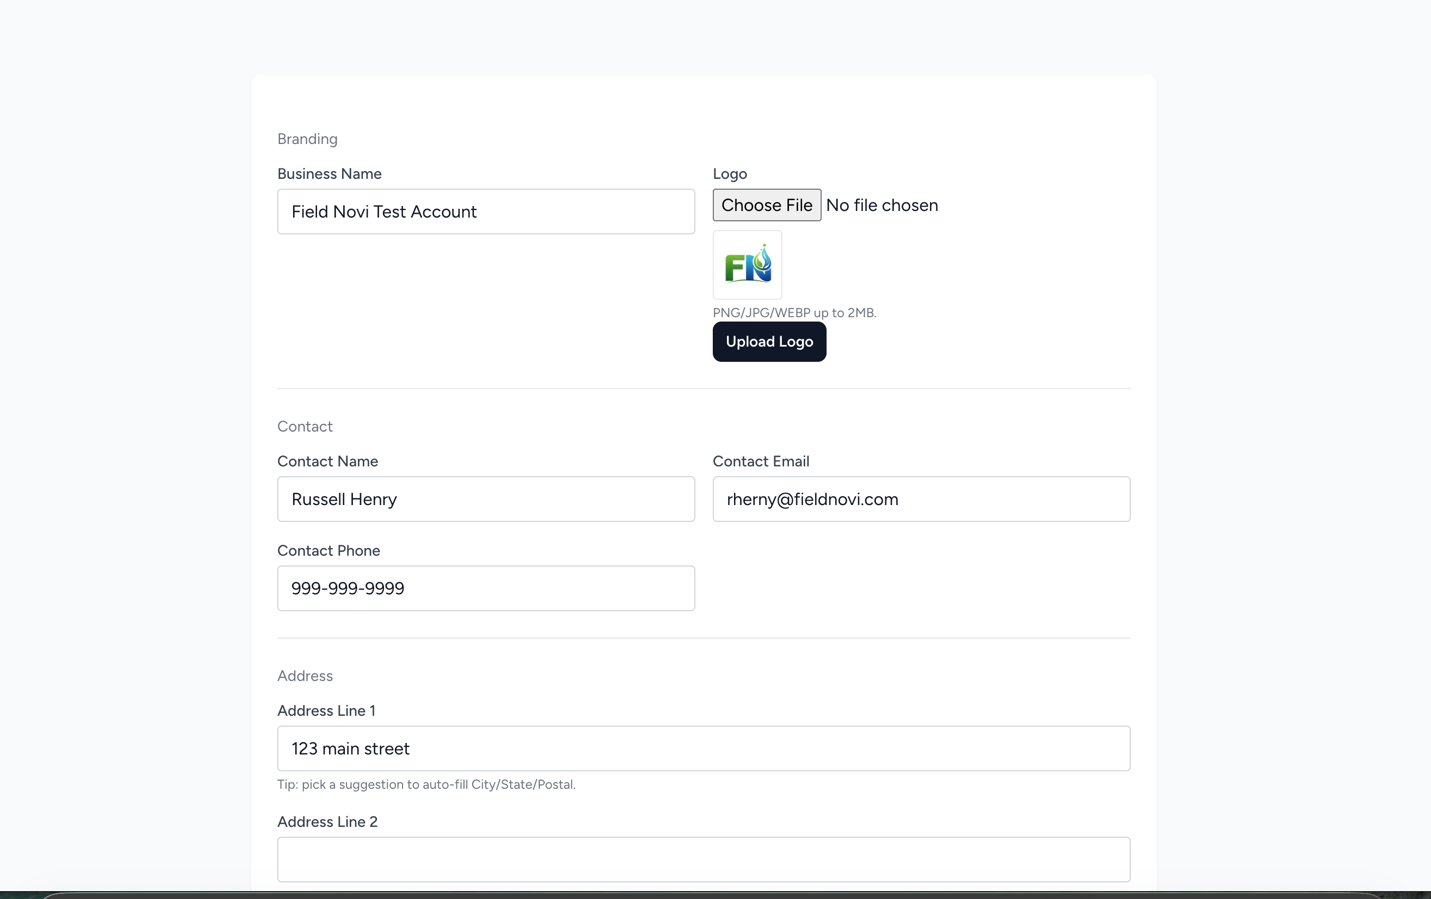
Helpful tip Open a report after changing your business information or logo to check the result.
STEP 2 OF 4
Check storage, items, and team seats
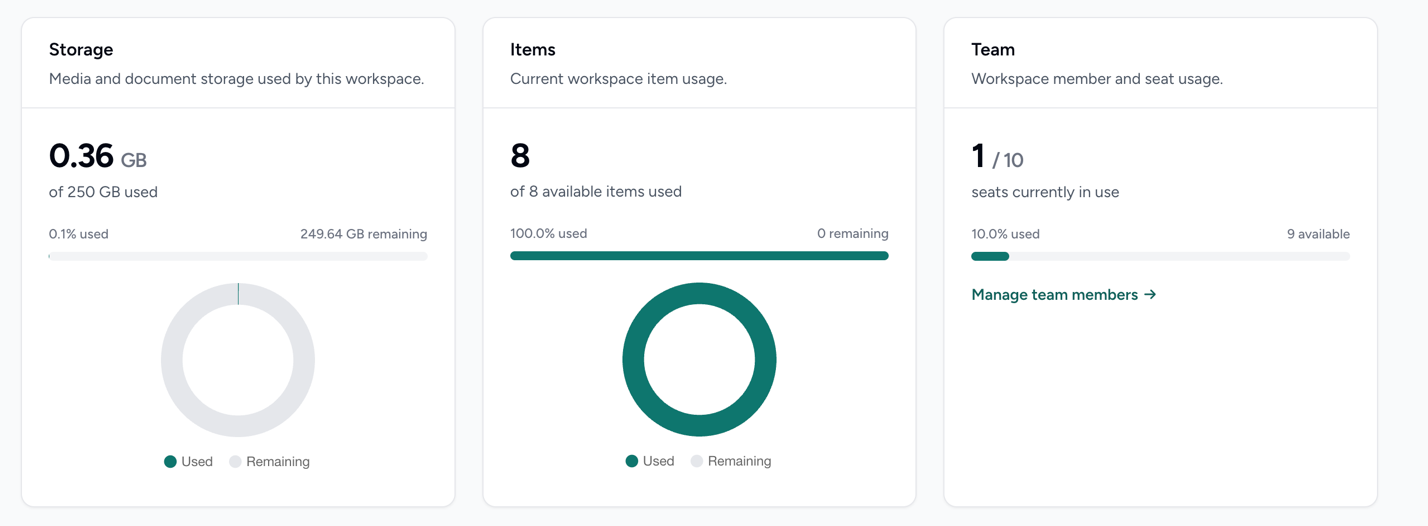
Review the dashboard usage cards for Storage, Items, and, when available, Team. Each card shows current usage and the allowance for that workspace.
Your plan determines the allowances and available team controls. Use the values shown in your own workspace; the screenshot is an example.
STEP 3 OF 4
Use Recently Viewed
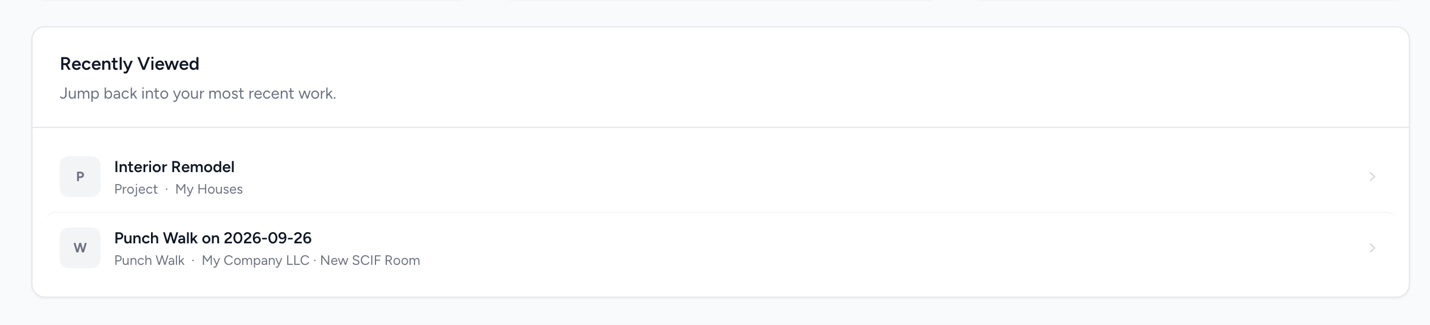
Find Recently Viewed on the dashboard and select a record to return to it. Check the record name and type so you open the item you need.
STEP 4 OF 4
Open a tool with Quick Actions
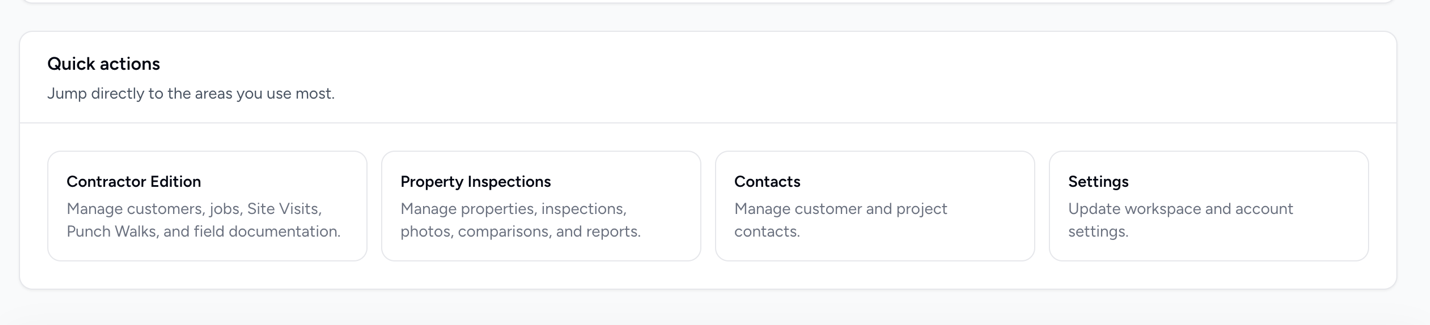
Use Quick Actions to open Contractor Edition, Property Inspections, Contacts, or Settings, depending on the actions available to you.
GOOD HABITS
Best practices
- Confirm the workspace before editing its business details.
- Use a clear logo that remains readable on a report.
- Review usage before adding a large batch of media or inviting more members.
QUICK ANSWERS
Common questions
Why do my usage limits differ from the screenshot?
The screenshots show a sample workspace. Your current plan and workspace determine the actual limits displayed on your dashboard.
Why can’t I see a setting or team control?
Availability can depend on your role and the selected workspace’s plan. Confirm the workspace, then ask the workspace owner or Support if you need help.
Where can I change my login name or password?
Open your personal Profile from the name menu. See Update your profile. Workspace business details are managed separately in workspace Settings.
FIELDNOVI SUPPORT
Still need help?
Email support@fieldnovi.com for questions or anything that is not working as expected.
Include these details
- Your name and organization.
- The workspace and any relevant record names.
- What you were trying to do and what happened instead.
- Any error message and a screenshot, when possible.
- The approximate date and time the issue occurred.
Do not include passwords or payment card details.